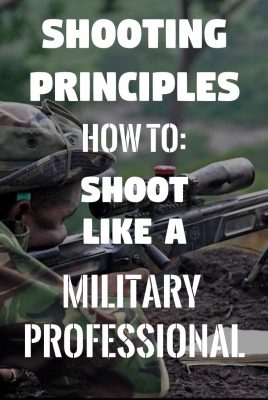
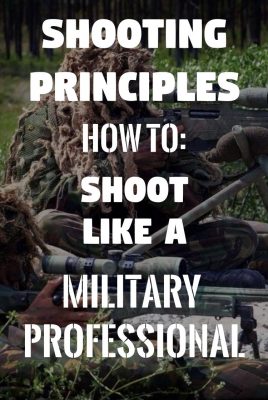
Marksmanship has its bearings from the beginning of history, from the use of a sling to the precision of arrows and right up to the humble beginnings of the musket rifle and future firearms.
Over the course of time, the principles of shooting straight and hitting your target have developed as a community ethos embedded in some simple standard principles that resonate from your average nearby gun range to an advanced military sniper selection course.
In this post, I cover the basic principles of marksmanship that I personally have learnt from the military, and that are used in the civilian and military world in professional shooting, safety awareness training, airsoft fields, military simulation areas and police academies.
What is the aim of marksmanship?
Marksmanship principles are not rules, they are a guide to shooting more accurate and enable a shooter to land rounds on a target in the same, or in a very close, position.
The principles in the shooting sport are what shooters rely upon to improve what is commonly referred to as ‘groupings’, which is essentially the distance between the shots on the target. If you make three shots, and they are close together, you have what is called a small grouping. If you have a large distance between you average shots, you have what is called a ‘large grouping’.
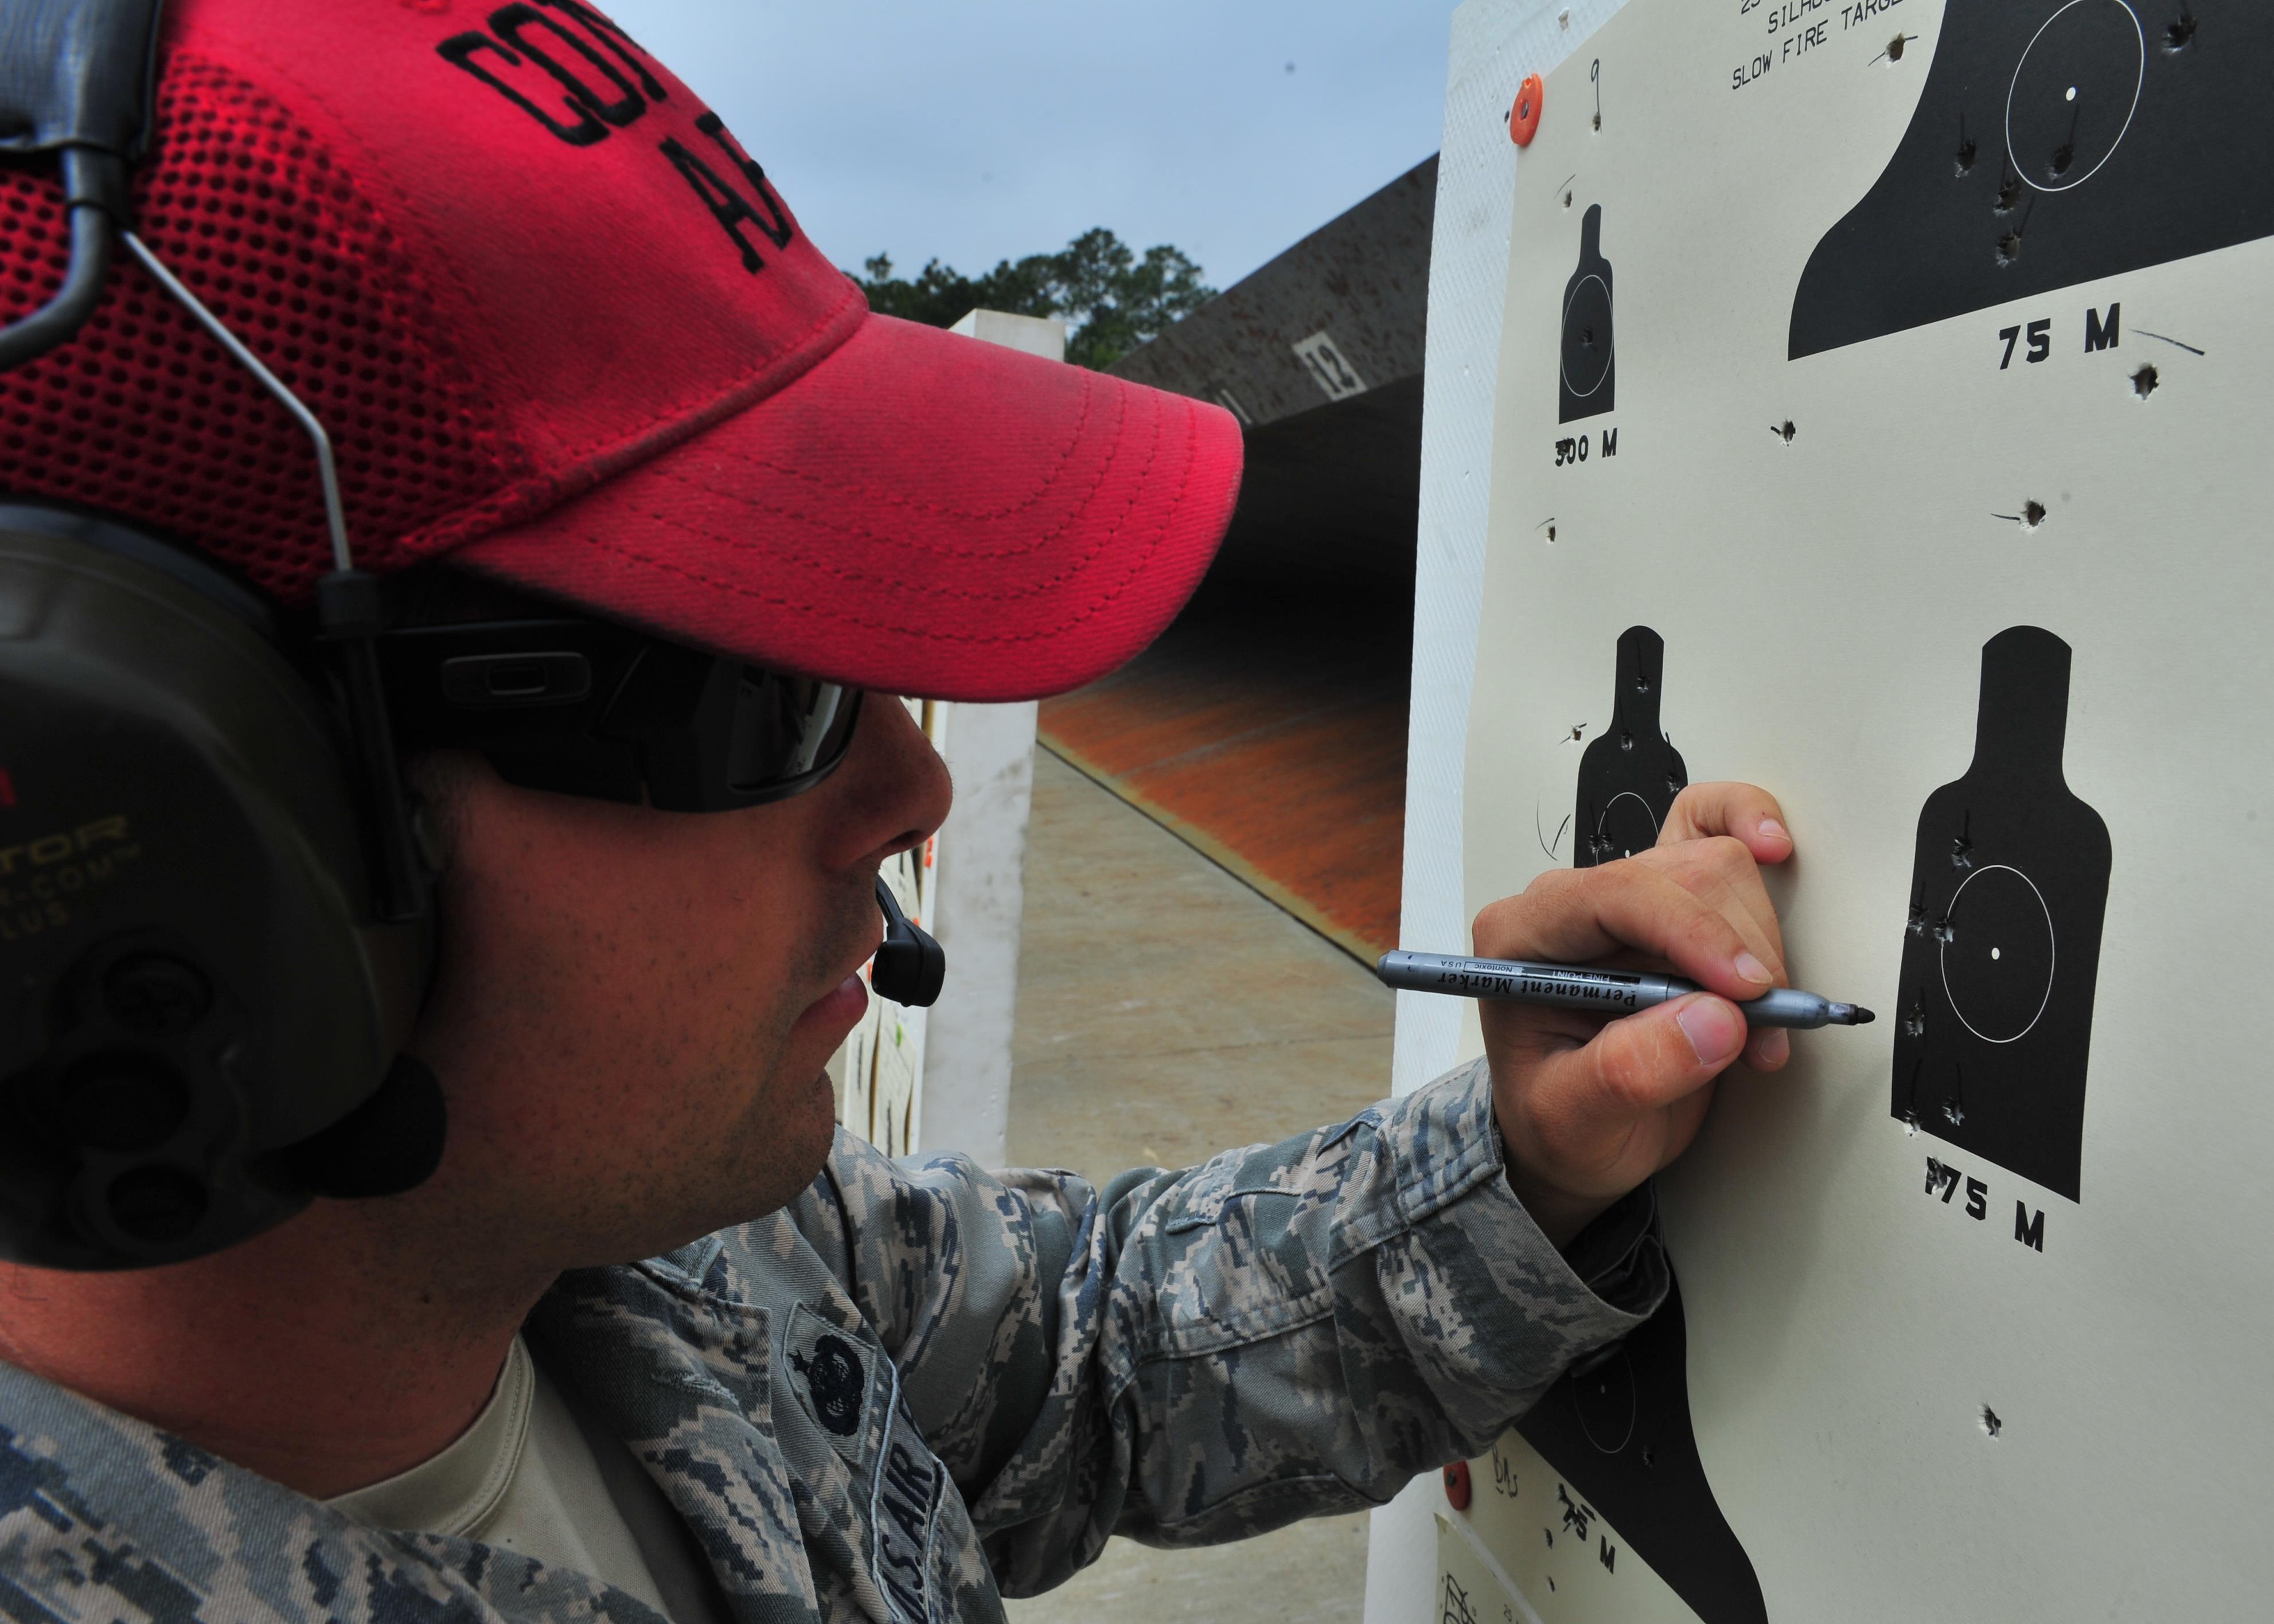
If you take a look at the image on the right, you can that a shooter is inspecting his groupings after a 175m shoot. Hitting the target isn’t what shooters aim for when they are sitting at a range, it is a tighter grouping that is the sole focus of what every good shooter wants.
Why? Tighter groupings display a control over the weapon. If you think about it like a game of darts that you might play at home with family, or in a bar, sometimes you might be lucky to get a dart in the bullseye center of the board. That’s great, but how many times can you do it? That’s the same principle behind marksmanship shooting. If you can hit the center of a target, then well done. But how much control do you have over your body, stance, weapon and firing accuracy to place several shots within the same area of each other? It’s hard, right?
Welcome to the life of an infantryman in the military, who dreams of tighter and more impressive groupings, making them more effective in a real situation, whether it be in a policing environment, security or military role like the popular film American Sniper.
What are the principles that can help my aim?
Here is where we get to the good stuff. If you are taking notes, or trying to remember anything out of this post, let me save you the time right here with the four marksmanship principles.
For me, my initial exposure to the marksmanship principles was through the Australian military principles, they are:
- The position and hold must be firm enough to support the weapon.
- The weapon must point naturally at the target without undue physical effort.
- Sight alignment and sight picture must be correct.
- The shot must be released and followed through without any undue physical disturbance to the position.
These principles resonate throughout the military community as they are meant to be rehearsed and memorized and used as a reference point every time a shooting position is built.
Furthermore, these marksmanship principles don’t only count for range shoots where groupings are measured either, they are meant to be used during fighting assaults and defensive roles as well. Whether it be a firing position from behind a tree in the field, a wall in an urban environment, or the range, these principles are simply quick reminders and checks to assist you in accurately placing your shots where you want them to land.
The US Military uses a similar four marksmanship principles, but they are more basic and broken down keywords for each principle. They are:
- Steady position
- Aiming
- Breathing Control
- Trigger Control
How can I use marksmanship principles to shoot better?
So you have noted down those four principles and you might be wondering how they actually work? While the US Military principles have less words and are easier to remember, the Australian Defence Force’s marksmanship and shooting principles are an explanatory sentence with meaning, so for the purpose of this post, I will use them.
Let’s go through each one and see some of the things you might want to do when adjusting your position and preparing yourself for an adequate firing position. This way, you will eventually be able to master the marksmanship that those Hollywood hero movies so easily portray, like this scene from Shooter.
https://www.youtube.com/watch?v=gWYO9yPxoEo
Marksmanship Rule 1: The position and hold must be firm enough to support the weapon.
Having a steady firing position is crucial, as you don’t want the shock and rebound of the first shot to affect the placement of the second shot, same as the third, fourth and fifth and so on.
Some things to remember when ‘building’ a firm position are:
- Secure rifle butt position high and firm in the shoulder
- Firing handgrip is firm and secure
- Firing elbow placement provides stability and balance and allow the shoulders to be level
- Nonfiring elbow placement is firm under the rifle as well as comfortable and is able to be easily pivoted in its position should the shooter be required to engage other targets
- Your neck should be relaxed and without tension.
- Your cheek should be able to naturally rest upon the stock of the weapon
- You should be able to relax your muscles in the firing position, relying primarily on supports or your bones to hold the position and not muscles, as they will fatigue and cause shaking in the position
Notice the positions of these two Marine recruits below. Both positions are solid firing positions that are comfortable, relaxed and strong.

Marksmanship Rule 2: The weapon must point naturally at the target without undue physical effort.
As every shot is made, the blowback in your gun will cause the weapon to move. It will, however, return back to its natural position. Therefore, an important rule in firing positions is to make sure that the aim and position you have made is natural, and not reflective of you having to move it in a particular way to create a better aim.
Things to remember for a natural aim are:
- Adjust your body to the aim of the weapon, not the other way around
- When multiple targets are present, you should find a middle point to adjust your aim to, and then pursuit each target from that naturally built position
- Building your body around the aim of the weapon only finishes when you are in a comfortable, non-straining position, as this will allow for a natural position between shots, and not cause fatigue during long periods of shooting.
Here is a good demonstration of how to build a natural and true position:
Marksmanship Rule 3: Sight alignment and sight picture must be correct.
Sight alignment is one of the golden rules of marksmanship.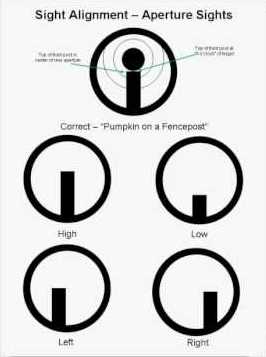 Why? Because when you are shooting at a distance target, one small misalignment on your end can result in a huge difference on the target. Every single alignment error between the front and rear sights repeats itself for every 1/2 meter of the shooting distance. So at the 100-meter shooting distance line, every error in alignment is multiplied 200 times.
When you are making this alignment, it is generally referred to as the pumpkin on the fencepost. In the image on the right you have an indication of a correct sight picture at the top. The four images underneath the correct sight picture are indicative of where the shot will fall, whether it be left, right, high or low, depending upon the aiming error.
Ideally, you want the pumpkin (target) to sit on the centre of your sight. In the image on the right, the sighting bar is the ‘fencepost’, adjust your aim so that the target sits on the top of that sighting bar, whether it be your iron sights, or your scope.
Other points to remember when forming a correct and true sight picture are:
- Your eye must be center with the lens or sights you are using to aim with
- A correct sight picture will be where the target, front sight post, rear sight and eye position are completely aligned
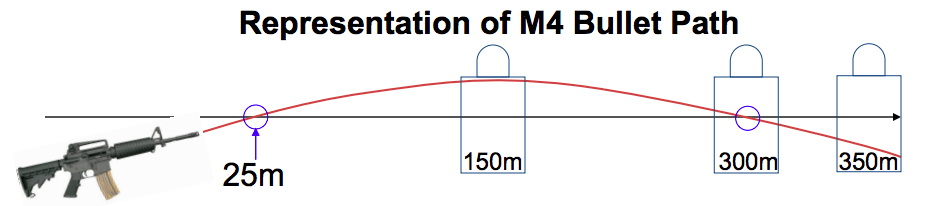
- When working with different distances, adjust your aim to the physics of the bullet. 300m is generally aimed at the center of the target. (Refer to the image below)
Marksmanship Rule 4: The shot must be released and followed through without any undue physical disturbance to the position.
Shots should be made after the fall of the breath in between the breathing cycle when the lungs have purged air. This would be a firing position at the exhale so that to find the exact same firing position, the firer would only have to breath out, hold and squeeze the trigger (image below). 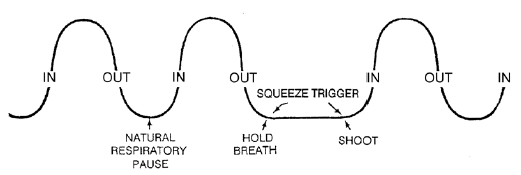
The second breathing technique is for engaging quick-action targets and is also used for instinctive and quick-engagement shooting (not on a formal range). This is where the firer teaches themselves to pause their breath on any part of the breathing cycle to take a sight picture and release a shot. This is an alternative to waiting for the complete exhale for shooting for the purpose of quick engagements

When a shot is made, incorrect trigger pressure, otherwise known as ‘snatching’ the trigger, can cause shots to miss the target quite easily. Instead, what experienced firers do, is adjust themselves to feel the pressure of a trigger, which is the point where the tension of the trigger is taken up to engage the striking mechanism of the gun.
![]()
Once the pressure has been taken up when a firer is about to make a shot, all they need to do to release the shot is slightly increase the pressure on the rifle’s trigger to fire a single round. This avoids any further undue pressure which would adversely affect the weapon’s aim.
Before firing a weapon, ‘dry firing’, or firing without rounds in the weapon, is a great way to see what the exact pressure is needed to initiate the shot sequence of a gun and will give the firer more certainty in knowing exactly where that position is located in order to make a well-aimed shot.
Using marksmanship principles in the community
All safe and accurate shooting principles go towards treating shooting as a safe and methodical sport, as well as a method of self-defense.
In learning proper placement of a the firer’s body, sight picture, and knowing these basic shooting principles, you will not only be able to shoot more accurately, but also encourage others to not just pound out rounds of ammunition at the range, but to actually consider where their rounds may land, and encourage the age-old competitive sport of precision shooting.
If you enjoyed this post, why not check out my other posts on preparedness psychology and easy tips such as:

One distinction made to me by my instructor in the Army was:
“stop breathing”, rather than “hold your breath” This is to promote normal breathing until you prep to squeeze, rather than prepping to hold your breath before you prep to squeeze.
This view made me one of the top 4 of 240 men and women, right out of the box…at least according to the Army.