As a prepper, food preparation is a basic survival skill you should learn. This includes hunting for food sources and building fires. Believe it or not, you can also bake outdoors as long as you know how to build a reflector oven.
You can build a reflector oven using an aluminum lasagna pan, stainless steel mesh, wire cutters, scissors, binder clips, and your handyman skills. With less than $10 worth of materials, you’ll be able to bake anytime and anywhere.
To know more about it, here’s how to build a reflector oven.
Quick Navigation
What Is a Reflector Oven Used For?
First of all, what’s a reflector oven and what is it used for?
A reflector oven works by reflecting heat from an open fire to cook food. For your information, commercial reflector ovens are huge. Even portable ones will take up too much space. For preppers, the best option is to bring the materials and make one.
So what is a reflector oven used for?
Anything you can bake in a convection oven, you can cook in a reflector oven as well. Yes, that means you can still enjoy freshly baked bread, cupcake, or pie even in survival situations.
So if you’re food prepping, consider including materials for making a reflector oven. And the best thing about it? You don’t need advanced handyman skills or plenty of tools to create one.
Steps on How to Build a Reflector Oven
Before building a reflector oven, you have to keep in mind what a reflector oven should look like. It should have an open side that should be facing the fire. The materials you need to use should be able to withstand heat since they will be exposed to open fire.
Also, you want to make a reflective oven that’s compact as possible but also should be big enough for you to cook at least two pieces of bread at a time.
Furthermore, depending on your purpose, you may want to consider bringing other baking supplies like a cupcake pan. You can also use this idea for your next campout if you have these supplies lying around.
Step 1: Gather the Supplies Needed
To make this project as easy as possible, you need to have all the supplies gathered for an easy breezy project. Some of these may be already at home so you don’t need to do a grocery run. List down what you’ll need:
- Lasagna pan made of aluminum (preferably 14×16”)
- Stainless steel mesh
- Metal binder clips or hinge clips
- Scissors
- Wire cutter
- Dough ingredients: Flour, sugar, salt, yeast
- Optional: Cookie sheet, cupcake pan, aluminum foil
Step 2: Fold the Lasagna Pan
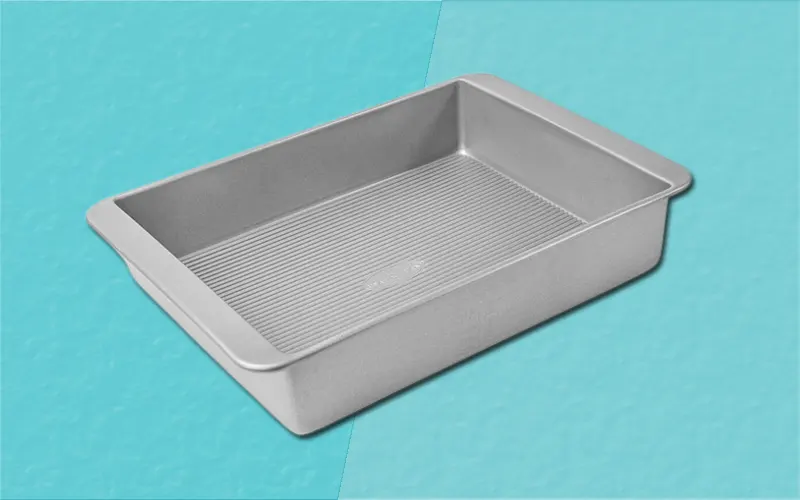
After you’ve gathered the supplies, start by working on the lasagna pan. Just a tip when picking a lasagna pan, choose a bigger size so you can bake more bread in it. A 14×16” lasagna pan is good enough, anything smaller than that may be impossible to bake in. Here’s what you need to do with the pan:
- Using your heavy-duty scissors, cut the four edges to flatten the pan. Cut each one of the four corners out in the shape of a triangle. You’ll basically cut out the corner to achieve the flat look.
- The next step is to fold the two parallel sides and flatten them out. Make an inner fold and follow with the two other parallel sides.
- At this point, you now have a flat lasagna pan. The next step is to fold it in half (crosswise). Flatten everything out make sure to flatten out the corner as well.
- The next step is to open the folded lasagna pan to form a triangular shape, just like a reflector oven.
- Make sure to place the folded edge inside (side panels) to serve as the platform of the DIY oven rack which will be discussed later.
- At this point, you now have a lasagna pan shaped like a reflector oven.
Step 3: Cut the Stainless Steel Mesh
The next step is to cut out the stainless steel mesh that will serve as your oven’s rack. Make sure to cut out a size big enough that will fit in the reflector oven. Using your wire cutter, cut the stainless steel mesh.
You now have a DIY oven rack that will serve as a platform. Place the oven rack in between the folded inner edge and close it up.
Step 4: Secure the Oven Using Binder Clips
You want to make sure the reflector oven is nice and secure. The next thing you should do is clip the folded inner edges using binder clips. Clip both sides and make sure the edges are securely bonded. There should be no open space on the edges of the reflector oven.
It’s preferable to use metal binder clips or hinge clips. Remember that you’ll be directly exposing the reflector oven to the fire, so it should withstand heat. You can use a paper clip as well. But since a part of it is made of plastic, it may not withstand heat.
Step 5: Set up the Fire
At this point, you now have a DIY reflector oven with a rack. Easy, right? The next step is to set up the fire. Just a few tips to remember when setting up the fire.
- Set up a fire in A-formation or a Teepee Fire so that it’s high enough and angled correctly to face the reflector oven.
- As a general rule when cooking outdoors, use hardwood like cedar or pine. Avoid using resonance wood like walnut or oak because it may affect the flavor of the bread.
Along with setting up the fire, you should build a pile of rocks in front of the fire formation. This will serve as the platform where you can place the reflective oven. You want the reflector oven to face the heat directly so you can place small rocks under the reflector oven to achieve that nice angle.
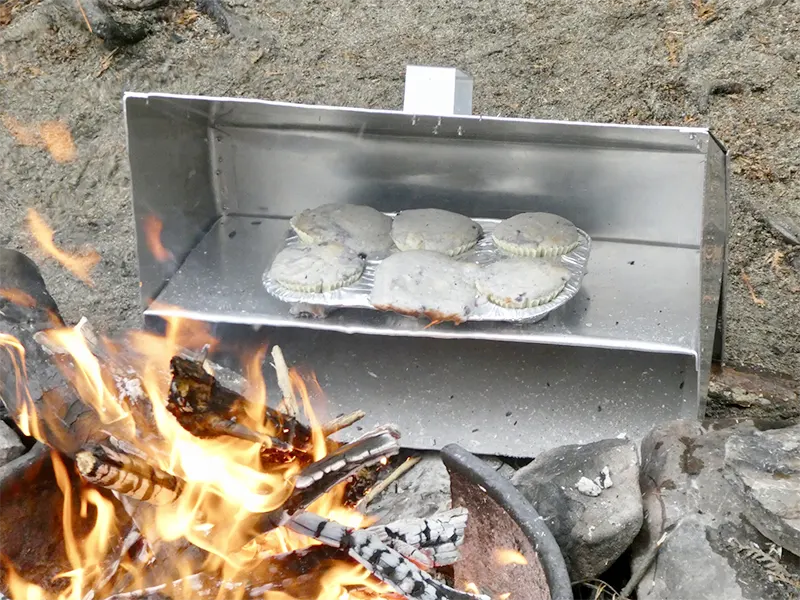
Step 6: Start Cooking!
With your fire already set up, the rocks in the right formation, and the reflector oven in the right angle, you can now start baking.
Some preppers place individually packed bread dough inside a zip lock so it’s ready to bake and it’s easier to knead the dough. Baking fancy bread like croissants may be a long shot when using a reflector oven, go for easy-to-bake bread instead.
When baking, you want all sides of the bread to cook evenly. You can turn the dough and flip it upside down from time to time to get an even bake. Make sure to use heat-resistant gloves or oven mitts when handling the reflector oven.
Step 7: Test the Dough
Just like baking in a conventional oven, you want to test out the dough. If you have a toothpick, that will be easy. In case you don’t have one, there’s always a stick you can use to test their dough. Once you’re confident that it’s done, set it aside and let it cool for a while.
Step 8: Enjoy!
There you have it! You now have your own DIY reflector oven so you can bake anytime and anywhere. Aside from bread, you can bake muffins or cupcakes as well as long as you have the baking supplies to do so.
Step 9: Fold it Up!
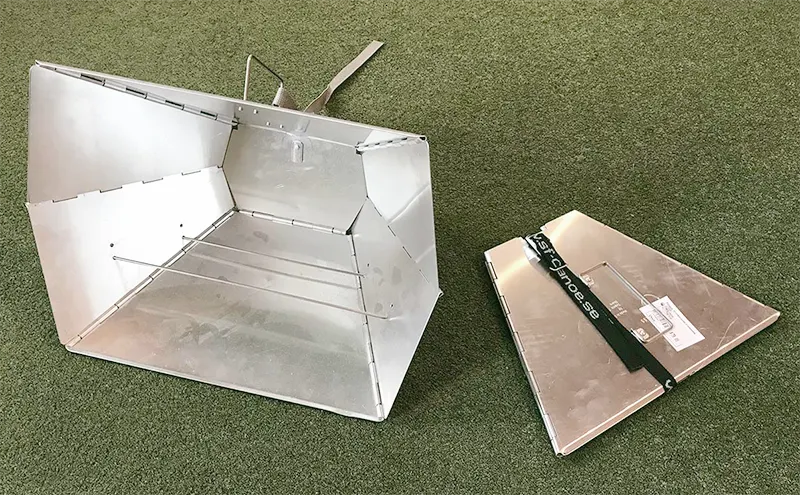
Once you’re done baking and the reflector oven completely cools off, you can fold it up and place it in your bag. The beauty of this DIY reflector oven is it doesn’t take up too much space. It’s handy and can be used several times.
To fold it up, simply remove the binder clips and the DIY oven rack. Fold and flatten the lasagna pan, and use the binder clips to securely fasten it. As a prepper, you want all your things to be as compact and space-saving as possible. That’s why this DIY reflector oven is just perfect!
Summing It All Up!
There are other ways to create a reflective oven as well. Such as using sheet metal, but this is a more complicated process that’ll take a lot of work and will be too bulky when carried around outdoors.
Just remember that as a prepper, you need to expect the unexpected. One thing that’s unexpected is having the craving for a piece of bread while in a survival situation. That’s why a reflector oven will come in handy.
If you have the supplies and ingredients to bake bread when in survival situations, you’ll have fewer worries about where to source your next meal. Plus, bread contains plenty of calories which means it is an excellent food choice for preppers.
Your photos don’t appear to be made with the materials listed. I am usually very goid at visualization, but your descriptions are difficult to follow. It would be very helpful if you included pictures of each step.