After reading this, you will be able to make a fire using anything
Do you know how to make a fire with a battery and a chewing gum packet? How about starting a fire with a zip-lock bag? Just how easy is it, when you’re trapped with no supplies, to start a fire without matches? We look at what you need to make a fire, how to build a fire, and 11 interesting ways to start a fire without a lighter.
Fire starting is one of the very basic needs of survival. It was the first thing I learned when I was a boy scout many years ago. Since then I have trialed several ways on how to make a fire, but the fun part isn’t the actual building of the fire, it is knowing how to light a fire, of which several ways are much easier than others.
When I am outdoors, it might seem like an easy venture to light a fire with matches or a lighter, but for me, I enjoy trying to light a campfire without matches, as not only is it fun to attempt, but if you were ever without matches, it would be nice to have been through the process of starting a fire before, rather than just relying on what actors do in Hollywood movies.
There are some reasons we need to know how to make a fire, and how to light a fire. Primarily, with a fire, you can have warmth, boiled and clean water, cooked food, light, and signal for help. These are just some of the reasons why the fire making skill is on the top list of things you need to know to survive in the wild.
For preppers, outdoor survival is an important skill as you never know when you are in an emergency and need to survive outdoors and in the wild. In that ideal scenario, a box of waterproof matches, some nice dry wood, and a bit of dry grass would make the perfect fire, but we don’t always have that, especially the first bit, matches. And what if you were in a damp environment like the jungle floor or wintery snow-covered landscape? Your wood will be wet, you might be without matches, and you’re probably going to freeze to death.
It is in survival circumstances like these that we need to know how to start a fire with:
- Flint and steel
- Sticks using the fire plow method
- Bow and drill
- Two-man friction drill
- A soda can
- A magnifying glass
- A bottle of water
- A sandwich bag
- A battery and steel wool
- Battery and chewing gum wrapper (tin foil)
- A 9V battery and steel wool
But first, let’s take a look at what we need and how we can construct the fire so that once we have our initial spark from one of the above methods, we can light our bigger fire.
What you need to start a fire
alt=”What you need to start a fire”
Before we look at the 11 ways of how to start a fire, we need to know how to make a fire by selecting the right fuel, such as wood or anything else we can get our cold hands on.
When it comes to making a fire in the wilderness, there are three essential elements that we need to make the fire:
- Heat
- Fuel
- Oxygen
Without these three things, you will not get a fire going no matter how hard you try. The first one, heat, can be easily produced by the flame of a lighter or match, a ferrocerium rod also known commonly as fire steel, by the combination of certain chemicals such as glycerol and potassium permanganate, or perhaps by friction.
In an urban environment where there are not so many trees, we could use a lot of other accelerants for a roaring fire, but in the woods, we need three types of materials:
Tinder – Tinder is a dry material that ignites with very little heat. When the tinder is dry, all it takes is a spark to catch it alight. We use the tinder in a fire as a fuel to ignite less-flammable material like wood. You can’t just hold a log up to a match and expect it to catch alight, the fire needs the tinder to substantiate the intensity and effect of the fire.alt=”What you need to make a fire”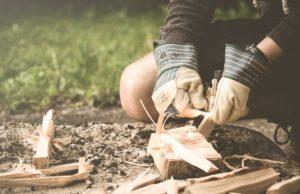
So how do you make tinder for a fire? There are several sources of tinder such as:
- Tinder from tree bark (like paper), cotton balls, tampon cotton, steel wool, and cattail fluff.
- Dry wood shavings that can be made easily with a pencil sharpener, knife, or shaving off a stick. You don’t need any tools do make this sort of tinder at all.
- In snow-covered areas use fungus from trees. It holds the heat quite well.
Kindling – Kindling is what we add to the tinder to give a fire a more solid form. Because kindling is such an accelerant, it will only last for a short amount of time. Essentially tinder is the initial start and then kindling is the next necessary ingredient.
It is very easy to gather as it is small sticks and twigs. These need to be dry. Any wood the same thickness as a finger is suitable for tinder. An effective way to make tinder if you are in a damp area is to find a larger piece of wood and break it with rocks or larger pieces of wood. The inside of this wood is dry and will be suitable if turned towards the inside facing the tinder of your fire.
Fuel – Once we have started a fire, we need fuel to keep the fire going. Everything much thicker than tinder or kindling that burns for longer is a good source of fuel. Often fuel is in the form of thick logs. If you don’t have an ax to cut these down try looking for a dead or fallen log and dragging it over your fire. Once you have enough kindling you can effectively use your fire to cut the long piece of wood into multiple pieces giving yourself more fuel.
Whichever method we choose to use, these three ingredients are necessary for the formation of a good fire. Dry tinder much always be used in all of these circumstances to catch the initial spark and form into fuel for the kindling to catch alight.
What you should know about firewood
alt=”survival fire making”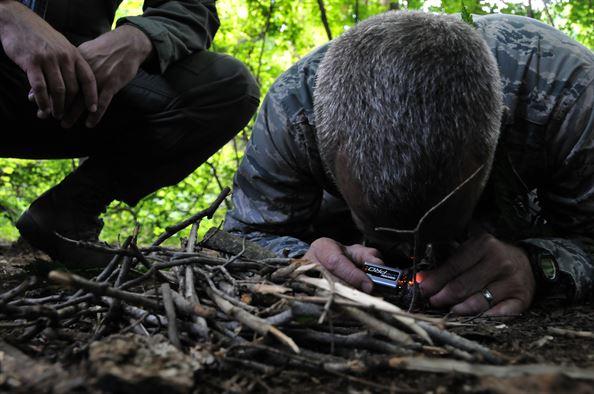
Once you have your firesteel you will need to collect your fuel, this is where our stealth fire starts – long before we strike a spark or coax our first flame into life, and we can reduce our impact by carefully selecting appropriate firewood for a concealed fire.
Think about what you need your fire for – To reduce your impact as you collect firewood, decide beforehand what you want your fire for unless you have an inadequate shelter or sleeping arrangements you won’t need the fire to warm you at night so you will probably just be purifying water or cooking. These kinds of jobs don’t take long so there is no need to spend hours collecting fuel and stacking it up ready for your fire. If you do it’s a sure sign that you have been there and might be planning to return.
Boiling (if you can) is better than flame cooking – Also remember that boiling food is quick, especially if you cut what you are cooking small, and this means you only need to use one cooking pot rather than having to spend time whittling a cooking spit and other camp kitchen items. Boiled food also retains all the fat and juices rather than it dripping into the fire so you will get a lot more goodness from a boiled squirrel or rabbit than you might from one which you have roasted on the fire. Remember the time and effort it has taken to catch your game in the wild and this will be an important consideration.
Boil over the flame, not embers – Picking your cooking method carefully relates to fuel. To boil something over the campfire, the quickest way is to suspend your cooking pot over the flames, not in the embers. It sounds obvious but so many people are used to cooking on a barbeque nowadays that flames are often overlooked as the stage of the fire that we want to get past to produce embers. Yes, cooking on embers is great and if you don’t have a cooking pot you might have no choice but to roast something on the fire on a spit or produce a bed of embers which you can lay food directly on, or bury it in embers to cook it. However to get a decent bed of embers your fire needs to burn for quite some time and you will need a lot of fuel, also there is a lot more to clean away from a large bed of embers than there is from a small twig fire.
The type of firewood for a stealth fire – Small twigs and sticks are the best type of fuel for what you want for a quick, low impact, fire. Find large bundles of dry twigs, snap them off as you go rather than collecting them all in the same place, especially if you are trying to remain unnoticed, as a single tree with all the low hanging dead twigs broken off is a sure sign that someone has been gathering firewood. The finest of these twigs should be no thicker than a matchstick and will be the best fuel that will catch the flame from your tinder, which might be dry grass or birch bark. Collect twigs up to the size of a pencil or as thick as your little finger. A good armful of twigs this size will easily boil a liter pot of water very quickly.
alt=”concealed fires”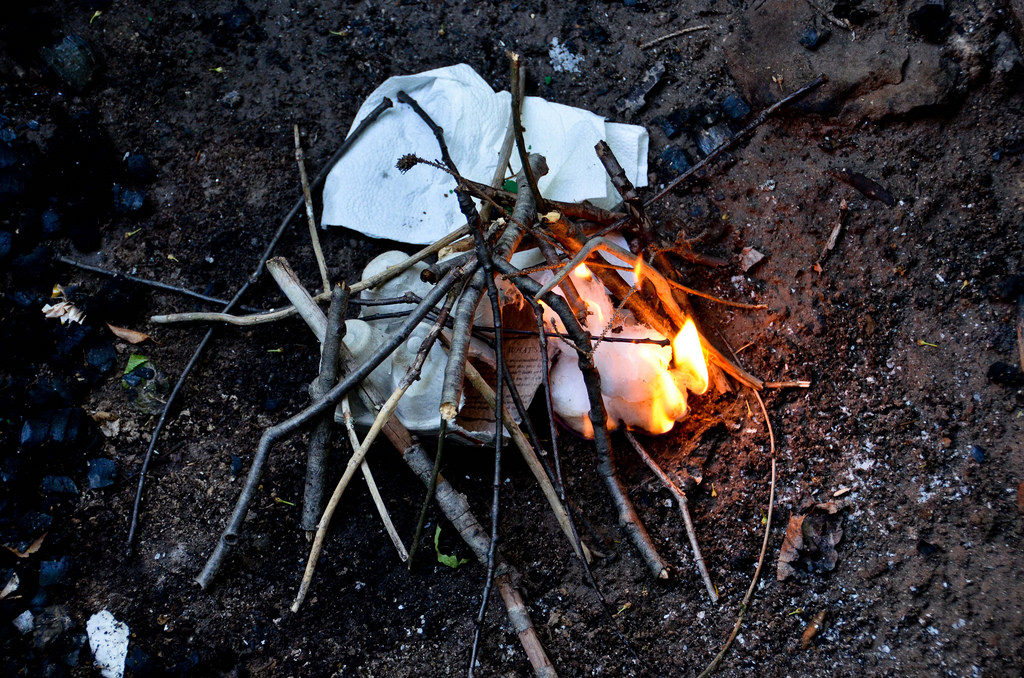
Don’t balance your cooking pot on rocks or logs around the fire as this will leave tell-tale and unsightly scorch marks on them. Instead, drive a forked stick into the ground and loop the handle of your cookpot over the end of a long stick that rests on the fork. The opposite end of the stick can be pushed into the ground or weighted with a log or rock. Once you are done with your improvised camp kitchen you can burn the sticks, take them with you, or scatter them in the woods and the ten to twenty minutes it takes you to boil up your rabbit and wild vegetables will not have marked the ground enough to leave a lasting scar after you scrub out the char marks with your foot and scatter some dirt and leaves around. This can leave very little sign of any campfire being made which is great for concealment practices.
If you are concerned about the amount of smoke your fire produces, make sure you are collecting and burning only the very driest of fuel and remove the bark from the larger twigs. Moisture gets trapped in the bark and bark smokes much more than wood. This will now produce less smoke as you burn it and a hotter fire as the heat will not be used to boil off the remaining moisture in the bark.
(Oxygen) Making sure your fire gets air – As for the oxygen, it is a no-brainer that fires need it to burn properly. However, when a fire does not have enough air getting to it, it will cause the fire to create more smoke. Usually, this is fine for a fire, but because we are trying to make a concealed fire, we need it to have plenty of circulation to eradicate that smoke cloud. If the fire starts to die out and smolder it will begin to smoke more so when you want flames to keep the fire stoked up with fuel and blow on it or waft it with your hat to keep the air moving to it and keep it hot.
How to make a fire teepee
alt=”How to make a fire teepee”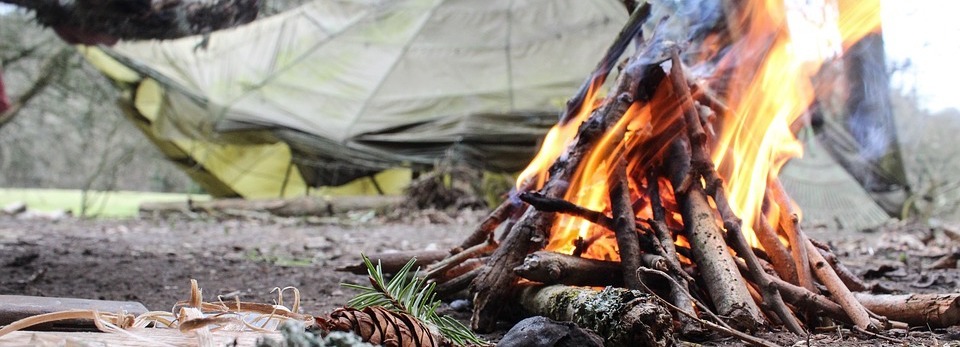
Now that we have our essentials for what we need to make a fire: tinder, kindling, and fuel, we need to know how to build the fire so that it can turn into a self-sustaining campfire without us having to blow on it. After it’s done, all we have to do is fuel it up.
Start with the bird’s nest – For every one of the ways below on how to start a fire, you need to make sure that your tinder is in a bird’s nest shape (featured image) and catch any spark in the concave part of the nest. There is no point going to all of the efforts of rubbing two sticks together if you’re not going to catch the little ember or spark that it causes.
Blowing the spark into a flame – Once the spark is in there you need to blow gently onto the ember and it will create a flame in the tinder. You now have a fire. Before you start any fire-making method you should have your kindling set up in a tee-pee (tent) method with a small opening for your bird’s nest. Once the bird’s nest has a sustainable flame, you should be putting it straight into the kindling with the fuel logs on standby.
Damp or wet areas – If you are doing this in a damp, jungle-like area, or you are working in a snow-covered environment you should keep the bird’s nest suspended in your hands while you are working on creating a fire. Once you have bird’s nest alight I would call this a sustainable flame as it is one that will last on a damp flooring. Once you have that bird’s nest alight, you can then use it in the main fire tee-pee.
Three types of smokeless survival fires
alt=”hidden fires”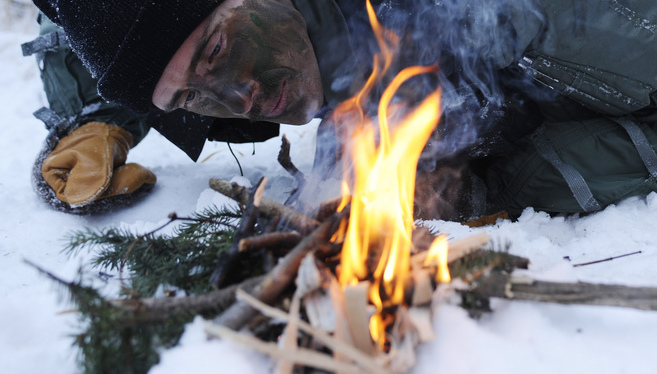
One of the most important things to remember about having a smokeless fire is that you need to keep the fire burning properly. Smoke is the product of incomplete combustion.
These three methods each use the must-haves for survival fire making that we mentioned above. They rely on optimal oxygen feeds and they use very small sticks and fuel to ensure that they burn quickly and with little or no smoke. When we are making a fire, the way we design it is called a ‘fire lay’. A lay is a way we arrange our fire, each fire lay is unique and may serve different purposes.
1. The ‘upside-down’ fire method – To ensure complete combustion and reduce smoke something else you can do is build an ‘upside-down fire’ where you arrange your main fuel and then build your fire on top of it, you will need a lot of fine tinder and kindling to get a fire like this to catch the main fuel but once it does, the fire burning down through the fuel will burn off the smoke produced as the smoke will have to pass up through the flames.
2. A small teepee of twigs – This is by far the most common approach to campfires and survival fires that we see. If you have ever made a fire, it is more likely you would have used this method than any other. The tepee method is a great way to start a fire and also an excellent way to quickly boil your water or food.
As these small twig tepee fires burn quickly and hot it is easy to hide their remnants and they don’t leave much of an obvious sign after you are finished with them. There are other fire lays which you might need to be aware of which may not be as easy to hide but which might be vital in very cold conditions or if you need to make use of very large timber without having an ax or saw to process your fuel. Long log fires and star fire lays are where larger logs are arranged in a star shape and slowly pushed into a central fire as they burn. This saves the energy of processing wood that is relatively large and couldn’t be dismantled quickly, or if you don’t have an ax and want to essentially ‘cut’ the log in half by burning through it.
3. Dakota fire hole – The Dakota fire hole is a very important type of survival fire. It is one that is regularly taught in military survival schools across the world and my opinion is the best smokeless fire you can make. Not only is the Dakota fire hole a good way to produce a hidden fire that doesn’t cast too much light or smoke, but it is simple to construct, and as the name suggests it requires a bit of digging which keeps its remains hidden.
alt=”dakota fire hole”
How to make a Dakota fire hole – In a survival scenario with limited equipment, making a Dakota fire hole is very straightforward. You simply need to dig a pit with a sharpened stick. You will need to dig two holes about a foot apart and then carefully tunnel between them. In one pit, which you should make slightly larger; two feet deep and large enough across to build a fire that will suit your cooking pot, you will build your fire, the other doesn’t need to be quite as big and will provide the air supply to your fire. As the fire burns, air will be sucked through the other hole you have made and will keep the fire burning hot. Not only are these fires very efficient but they are very easy to conceal once you are finished as they can just be filled in again.
Below is a video from one of our favorite Youtube survivalists Alfie, on the Dakota fire hole, and is a great instructional.
11 Ways to start a fire without matches
Now that we know what we need to make a fire with the type of wood we need, and a great way to build the base for a good fire, let’s look at some alternative ways to start a fire without using matches or a lighter. This list is broken down into three main sections, which include the traditional primitive fire-making methods, using sunlight to make a fire, and then some of the more interesting ways to start a fire that you might not have heard of.
1. Flint and steel
alt=”Flint and steel”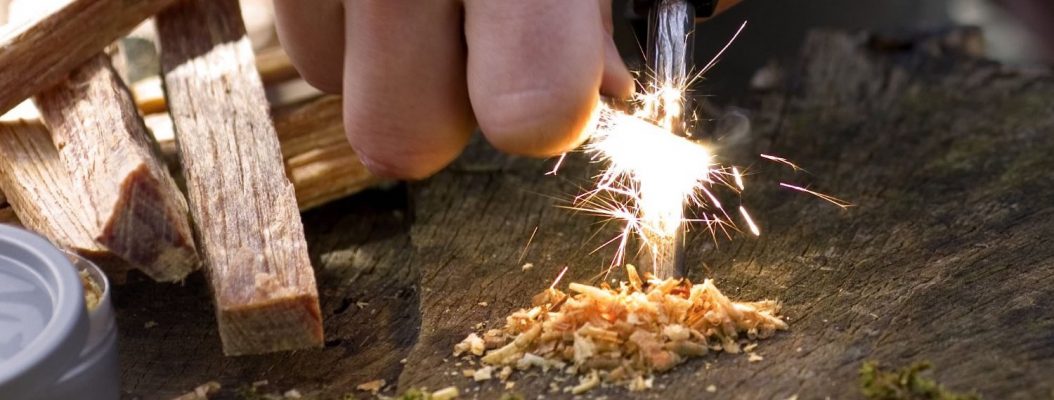
Flint is a family of stone. A flintstone is not a cartoon, it’s either quartz, chert, obsidian, agate, jasper, and a few other less common ones. Essentially, what you want is a stone that is harder than steel. If you’re in upper Canada you’re in luck as they are very common in those areas, but for everywhere else it shouldn’t be too hard to find.
If you can’t identify any of those types of rock, just grab some of the different variations around you and try them out against the metal you have or a steel knife.
Step 1: Move the stone against the knife in a shaving motion – it will cause sparks. These sparks are small splinters of steel being ‘shaved’ off and are heated by the friction of the shave. If you have a piece of dry fabric dry wrapping it around the stone, it will catch the spark and start warming. Having rotten wood is also a great way to catch the spark that comes from steel.
Step 2: Shave the sparks into the rotten wood, fabric, or tinder bird’s nest.
Step 3: Place the wool, wood in the bird’s nest, and gently blow until you have a sustainable flame.
Step 4: Place the nest in the kindling tee-pee, you now have a fire.
2. How to start a fire with sticks (Fire plow)
alt=”How to start a fire with sticks (Fire plow)”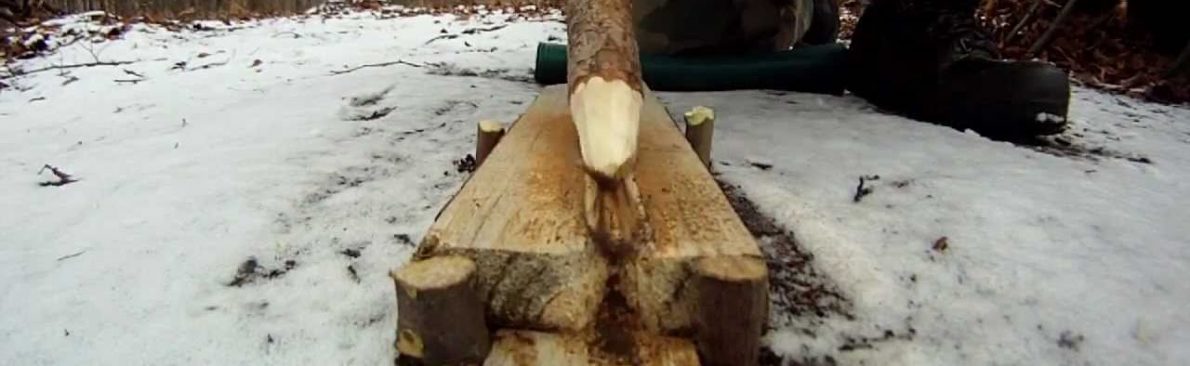
You have probably always wanted to know how to start a fire with sticks? It’s an essential survival skill known as a fire plow. Fire plows are manually hard work but are a very simple and thorough way of fire starting. The fire here is originating from the friction caused between two bits of wood. The primary concern here is having dry wood, without it you’re going to be stuffed as the friction between the wood is meant to light the wooden dust particles that gather in the plow.
Step 1: Get a large piece of wood as a plow board. Ideally, this would be a log that has been split longways down the middle. If you are in damp environments a fresh piece of wood split in the middle can also be used as it will be dry.alt=”Not using matches to make a fire”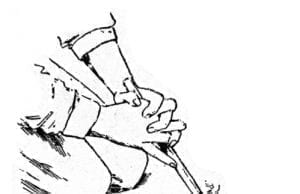
Step 2: Make a divot in the middle of the wood longways down the plow. This will be the path that your stick will run on.
Step 3: Get a firm stick and run it repeatedly through the groove made in step 2. Make sure the stick has a blunt end which you can make by using a rock to blunt the tip of the stick.
Step 4: Once you have run this enough tilt the plow so that the wooden dust is at the end of your divot, the friction you make from the stick running along the divot will hit the wooden dust causing an ember.
Step 5: once you see a little ember or two, blow gently to get the dust alight and place some tinder on it as well.
Step 6: Once you have a sustainable flame place nest in the kindling tee-pee, you now have a fire.
3. Start a fire with a bow and drill
alt=”how to make a fire”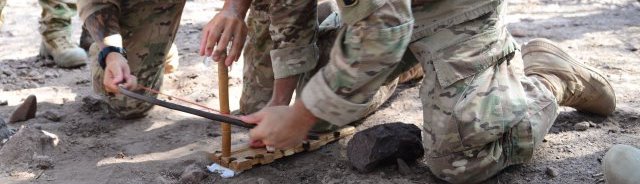
This method is another way to start a fire with sticks and quite similar to the last, however, a little more bush engineering goes into the formation of this contraption. This method is a level above the last one because it involves a piece of string, twine, or other naturally forming rope to make the bow. Shoelaces could be used for this too.
Step 1: Make a bow – it should be 30 inches or 60-70cm long. It should have a little bit of flexibility but it should not be pulled like a bow. It should be more of a slight flex in the wood. Notch your string/cord onto the bow but loose enough so that you can wrap the excess in the middle around your drill.alt=”Making a fire drill”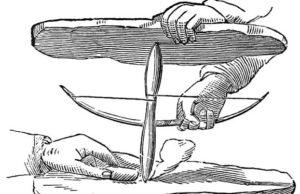
Step 2: Get a drill – it should be thumb thickness of softwood like cedar. Make sure the drilled wood is dry. The drill should be about 8 inches long and should be blunt round on one end and blunt on the other.
Step 3: Get a fire plank. This would be the same as the one used in the fire plow above. Make a V shape notch in the middle of the plank. At the tip of the V make a small hole for the drill. The pointy end of the drill should sit in the hole, not go through to the other side. This is where the drill will sit and the wood dust will catch around it.
Step 4: Find a rock to hold on top of the drill. Ideally, it would be a stone with a concave cup-like section to hold the drill in place as it drills the plank. You could also use the knot of a branch or bone to hold it in place.
Step 5: Place bird’s nest of tinder under the plank to catch the ember when it forms.
Step 6: Wrap the cord around the drill once and start moving the bow left and right while holding the top. Use a small bit of pressure on the top while doing this. There should eventually be some smoke coming from the dust collected.
Step 7: When the sawdust pile is smoking, gently lift the drill out of place and put a slight amount of tinder on the dust and gently blow into a flame. Add the sustainable flame to the bird’s nest. You have a fire.
4. How to start a fire with a two-man friction drill
For the bow drill, two people are better than one. Team up with someone and do the same but easier.
Step 1: instead of using a bow wrap the cord once around the drill and pull the left side first the right. The drill should rotate.
Step 2: Have your partner apply downward pressure to the top of the drill.
Step 3: When the sawdust pile is smoking, gently lift the drill out of place and put a slight amount of tinder on the dust and gently blow into a flame. Add the sustainable flame to the bird’s nest. You have a fire.
Methods that use sunlight for a fire
Sunlight is one of the alternative ways to make a fire without a lighter or matches that have been around for a long time. It can only be done in areas that have a strong amount of sunlight and essentially works to start a fire with a magnifying item, whether that be glass, a plastic bag with water, or a way to concentrate the sunlight, such as a soda can. If you are in an area with strong sunlight, this is the best way to start a fire.
5. How to start a fire with a soda can
I haven’t personally tried this but I like the idea of it.
Step 1: Shine smoothen the underside of a can with clay
Step 2: The bottom of the can directly towards the sun
Step 3: Place your kindling cloth, rotten wood, or charcoal cloth on the point where the sun is reflecting at its strongest from the can. This should be the smallest point of light.
Step 4: Gently blow into a flame. Add the sustainable flame to the bird’s nest. You have a fire.
6. How to start a fire with a magnifying glass
You might have done this as a kid with a magnifying glass, it’s quite easy to do and it has been a cause of some bushfires from broken glass on the side of the road.
Step 1: Get a flashlight lens or other clear glass
Step 2: Concentrate the sun’s power onto your tinder, charcoal cloth, or other starters.
Step 3: Once you see smoke, gently blow into a flame. Add the sustainable flame to the bird’s nest. You have a fire.
The Interesting Ways To Light A Fire Without Matches
These are some of the more innovative ways of fire making that some of you might not know about. Some of these I only just found out about while writing this post, and am happy to say that I have them in my repertoire of survival knowledge. I hope you enjoy them just as much.
7. How to start a fire with a bottle of water
Easy. The same as above but you want to make sure the bottle is clean and the water is clear. Repeat the steps above.
You have a fire.
8. How to start a fire with a sandwich bag
This one is the same idea as the bottle – but it looks a little bit cooler and sometimes you just don’t have a water bottle with you.
Repeat the steps from the magnifying, but with water in the bag.
You have a fire.
9. How to start a fire with a battery and steel wool
Yes, it is possible to start a fire with a battery. Some old phones have a removable. You can use the battery’s electrical charge on steel wool to cause embers.
Step 1: Remove the battery from the phone
Step2: Gently rub the battery against steel wool until red embers appear in the wool
Step 3: apply tinder, blow gently, you now have a fire.
10. How to start a fire with a battery and tin foil
This is a pretty neat hack to know and became popular in an American women’s prison Netflix series called Orange Is The New Black. It was a regular activity for the women of the show to light their cigarettes with a piece of chewing gum wrapper and a battery. I tried it, and yes, it works.
Step 1: The chewing gum wrapper has to be a foil metallic one. Cut it so it makes the figure 8 almost, with both ends being bigger than the middle section.
Step 2: Attach the ends of the wrapper to each end of the battery.
Step 3: The joining of the paper will create a circuit between the two.
Step 4: The paper will set alight. You have a fire.
11. How to start a fire with a 9V Battery and Steel Wool
This is very similar to the phone battery method except it saves you the loss of a mobile phone battery.
The best thing about this type of fire is that you can do this in wet conditions with wet steel wool.
Step 1: Get steel wool and 9v battery
Step 2: Rub steel wool onto ends of 9v battery
Step 3: Place steel wool in the bird’s nest. You now have a fire.
I had a lot of fun putting this list together and trying out some of these just at home. Give them a go and let me know if you found them difficult. While this was more of a fun post, there is a serious side to this, and that is that there are various ways you can provide yourself with the necessary warmth of a fire when it comes to survival as well as signaling for help.
On most occasions, you would have your bug-out bag or a survival kit with the necessities.  alt=””
![]() In that kit, you should have some sort of fire starter. While there are these various ways you should have a fire flint stick like this. They are cheap, useful and in one strike your bird’s nest alight and you have a fire.
In that kit, you should have some sort of fire starter. While there are these various ways you should have a fire flint stick like this. They are cheap, useful and in one strike your bird’s nest alight and you have a fire.
When you are in a survival mode, your body needs to conserve energy as you are on foot with low foods and energy and a lot of these methods (except for the makeshift lighter electrical ones or sun-powered ways) use quite some energy. This is why it is imperative to have a back-up fire starter in your kit.
Remember when making a survival fire
There is an inherent danger in making fire, handling knives and axes, and many other survival tasks, but another danger to be aware of is the danger of wildfire if you do not manage your fire responsibly.
Make sure that your fire is built away from other fire risks such as dead dry trees, or on beds of pine needles or peat soil. From an environmental perspective fires created by your carelessness can have a devastating impact on the wildlife and ecosystem of an area, not to mention the irony of making your survival situation worse if you manage to destroy all your equipment or are killed in a wildfire of your own making.
This is also another reason why low impact fires are great, especially the in-ground Dakota fire hole, as they are not open fires and are small and underground, so are less likely to catch onto any neighboring shrub or bush. Just make sure that you are in a clear or clear as possible area.
Extinguishing your fire
alt=”how to make a dakota fire hole”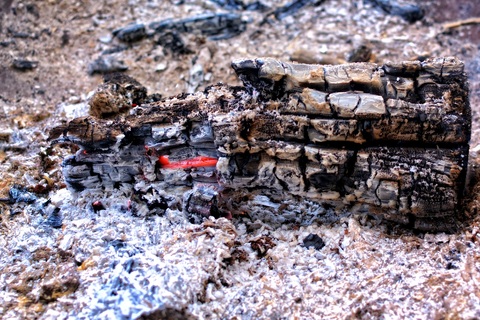
Once you are finished with your fire remember that you will need to dispose of the ashes and unburned material to reduce your impact on the environment as to reduce the signs you leave behind for any possible followers. If stealth and evasion are the goals, to make sure putting out your fire is as discreet as possible your first aim should be to burn the fire out completely if you have time. If you do need to quickly extinguish it remember that dumping water on it will cause a big rush or steam and smoke. To avoid that, dump soil on it instead or as your fire is probably small scrub it out with your foot or a stick and move the smoldering remnants away from each other, small fuel like the twigs you are using will cool very quickly and you can then dispose of the scorched twigs and ash.
Once your fire is extinguished and well concealed, you can move on safe in the knowledge that only the most skilled of trackers will be able to tell you have been there and that you were not spotted by using one of these smokeless fire-making methods.
Fire making skills are vital for the solo survival during wilderness. Thanks for sharing the information.
Well I found this because I was trying to figure out who I started a fire. I had sprayed iron skillet sitting on foil outside w Oven Off. I took a pebble and was scraping the pan with it. When I was done I carried it inside to sink. I decided to was the foul up and scrub some more and realized the pebble was inside the wad of foil. Soon it was too hot to hold and then smoke was coming. I ran water over it It stopped. Then I continued and again it started smoking and too hot to handle. I wasn’t sure how to throw this away afraid it’d start a fire in trash.
rust combined with powdered aluminum form a type of explosive called thermite.