Navigating through unfamiliar terrain can be a daunting task, especially when relying solely on technology is not an option. That’s where land navigation comes in. Being able to read the land and understand the environment is a critical skill for any prepper or outdoor enthusiast. So, how exactly do you read land navigation?
To read land navigation, you must learn to identify terrain features, use a map and compass, and navigate using various techniques. It involves understanding and interpreting the natural features of the land to determine your location and direction.
In this article, we’ll explore the basics of land navigation and provide you with essential tips to help you navigate through any terrain with confidence.
Quick Navigation
- Understanding Maps
- Compass Navigation
- Using the Terrain
- Planning a Route
- Tips for Successful Land Navigation
- Conclusion
Understanding Maps

GPS has changed the way regular people navigate the land. The traditional method of map reading and plotting and the use of a compass are gradually lost because of this advancement.
Terrain map reading is a required skill set for those in the military. However, you don’t have to join the army to learn the basics of understanding maps.
Different Types of Maps
When you are in an unfamiliar place, a map is very useful for navigating your surroundings.
If you are lost or uncertain of where you are, man-made structures such as roads, power lines, and rail tracks can indicate a human settlement nearby.
There are different kinds of maps showing different features of the land. It is helpful to understand each one to know which is ideal for you. The four types of maps are listed below:
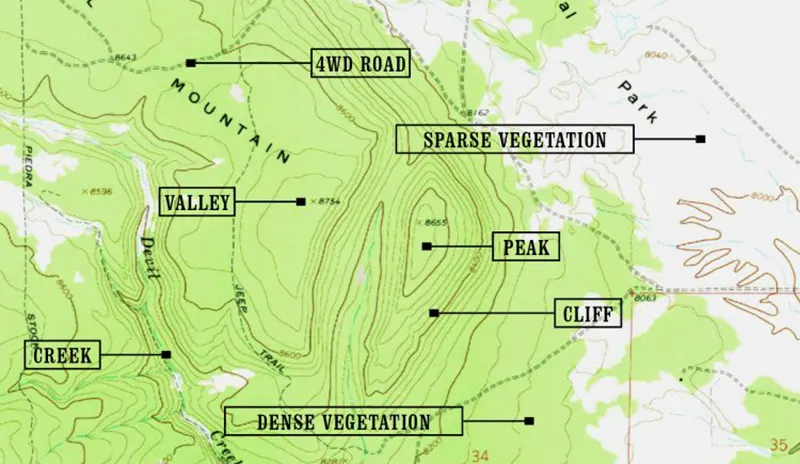
1. Topographic Map
Topographical or topo maps show detailed elevation and contour lines of a landscape. You use the contours of the map to determine your exact location.
2. General Reference
A general reference map is easy to read and perfect to use when you know your destination. This map contains major cities, streets, transport routes, landmarks, and natural features such as rivers.
3. Navigation Charts
These are maps commonly used when traversing through sea or air. The information contained in the navigation charts is purposely made to avoid accidents such as submerged rocks.
4. Cadastral Maps
Cadastral mapping is considered an ancient form of mapping to show land ownership during Ancient Egypt. Currently, cadastral maps are used when surveying a house or property to show boundary details.
Parts of a Map
There are four essential parts of a map. Understanding these elements is crucial for efficient land navigation.
Title
The title tells what the map is about (theme). Common map themes include roadmaps, political maps, and physical maps.
Legend
Symbols are used all over the map to indicate specific features. The legend gives map readers a guide on what these map features represent.
Compass

The compass is a significant part of the map. It distinguishes the north, south, west, and east directions. The purpose of the compass is to redraw the map from any orientation without losing accuracy.
Latitude and Longitude
Latitude and longitude are critical features of a map. You can name a specific location on the map by reading the latitude and longitude.
The grid square created because of the latitude and longitude provides an accurate 2D representation of planet Earth, with each line having zero points.
Scale and Contour Lines
The distance scale represents the relative distance between each feature of the map. It appears as a series of lines from a ruler, positioned in one corner of the map with labels indicating the unit of measurement.
Contour lines represent the elevation and relief on a map. With the help of contour lines, you can make better navigation decisions, such as going around the hill instead of going over it.
Symbols and Colors on a Map
Symbols on maps represent both natural and man-made features. The legend included in the map indicates what the symbols are for. It can represent bridges, cities, highways, buildings, forests, etc.
There are six commonly used colors on maps – brown, green, blue, black, red, and yellow.
Brown. This color is often used to represent contour lines. It can mark historical sites, national parks, deserts, or military bases.
Green. This color represents areas with abundant vegetation or trees like forests, woodlands, parks, and vineyards.
Blue. Bodies of water will permanently be colored blue on the map, whether it is a big or small body of water. Blue contour lines may also represent glaciers.
Black. This color represents man-made structures such as roads, cities, bridges, and buildings.
Red. This color represents transportation and recreational areas on the map, such as campgrounds, airports, urban areas, and picnic areas.
Yellow. This color represents quadrants and boundary lines.
Compass Navigation
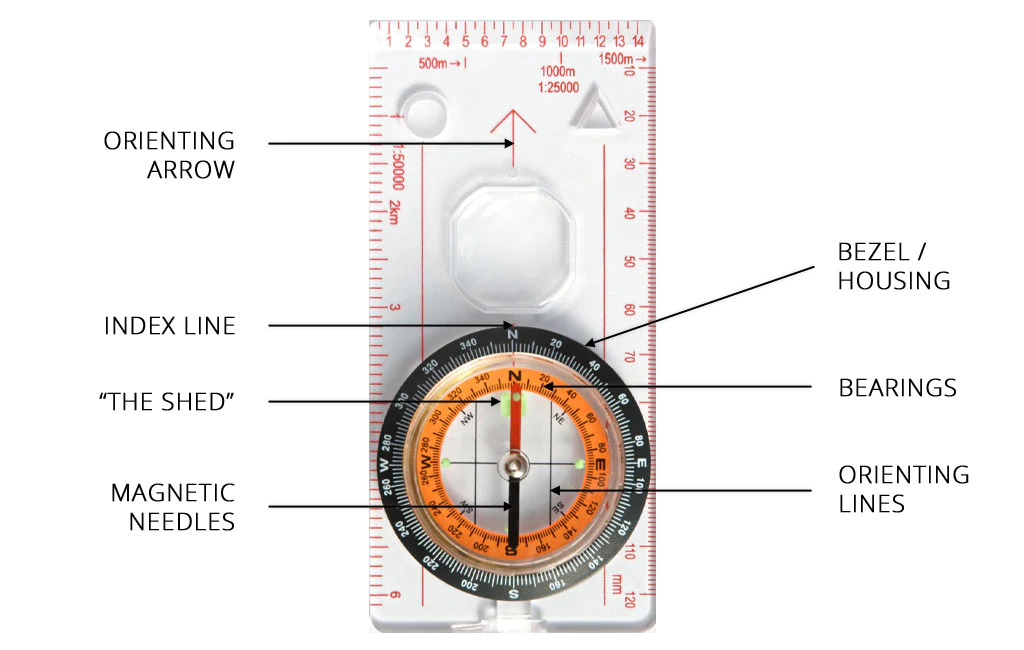
Parts of a Compass
There are seven basic parts of a compass.
Base plate. This is a hard and flat surface on which the dial is mounted.
Compass dial. It is a ring (0-360 degrees) etched on the outer edges of the compass.
Direction of travel arrow. This points to the direction you must travel when the bearing is set.
Orienteering arrow. This is used to align a compass to a map.
Magnetic needle. The red pointed arrow always indicates north, while the white pointed arrow points south.
Orienteering lines. A series of parallel lines on the floor of the compass.
Ruler (inches). Helpful in measuring distances on a map.
Magnetic Declination
Magnetic declination simply refers to the compass’s deviation from the true north. If you plan to purchase a compass, it is best to get one with an adjustable mechanical declination for more accurate land navigation.
Using a Compass to Take Bearings
After plotting the grid line coordinates on the map, you must determine the bearing for each coordinate. First, draw a line from the first plot and extend further than your second plot.
Using the protractor, position the protractor’s hole over the first plot. The 0 degrees should be in line with the north direction.
Determine which line you have drawn on the map that aligns with the protractor hashmark.
Write all the bearing coordinates in a notebook. Keep getting the bearing until you are done with all the known MGRS coordinates.
Following a Bearing
Once you have completed taking down all your bearing coordinates, it is time to test them out. Bring out your compass and index your bearings.
Move until the needle is inside the box. Keep doing this with all your coordinates until you have reached your destination.
Using the Terrain
Understanding Topography
It is important to understand the land’s surface, such as the mountains, rivers, or depressions on the surface.
It also includes artificial or human features such as cities, buildings, parks, boundaries, landmarks, etc.
Understanding topography helps hikers use topographic maps to find trails and slopes during land navigation. It can guide engineers in building roads, buildings, dams, etc.
Identifying Land Features
Being able to identify land features helps you plan your navigation. Basic land features include hills, ridges, valleys, saddles, and depressions. It also includes man-made structures such as buildings, dams, roads, etc.
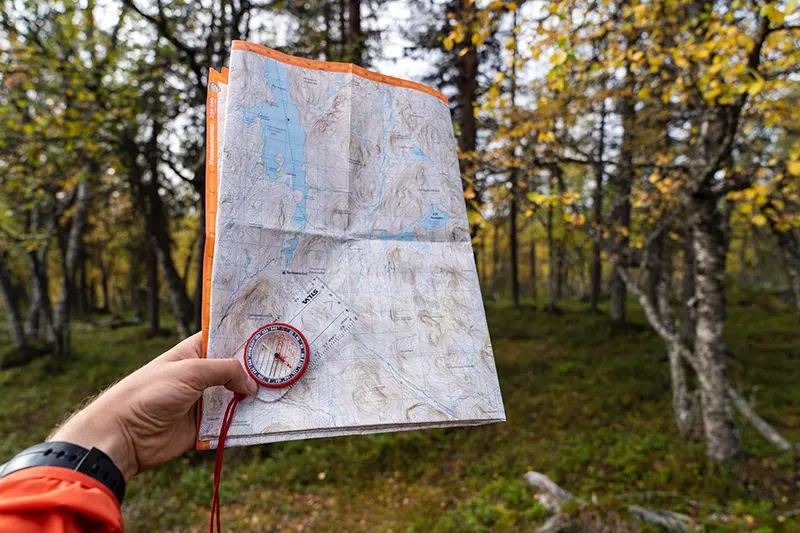
Using Terrain Association
This is the ability to identify terrain features by contour intervals indicated on the map. It uses three techniques:
- Orienting the map on a flat surface
- Locating at least two prominent features on the ground
- Laying a straightedge on the map.
Terrain Association is more challenging to plan and time-consuming. It entails more planning and map reading.
If you get lost, you can quickly get back on track. Compared to Dead Reckoning, one mistake, and you are in big trouble.
Dead Reckoning
This process calculates the current position by using a pre-determined reference position. This method was used during the Age of Exploration. At present, it is widely used in automotive navigation systems.
Planning a Route
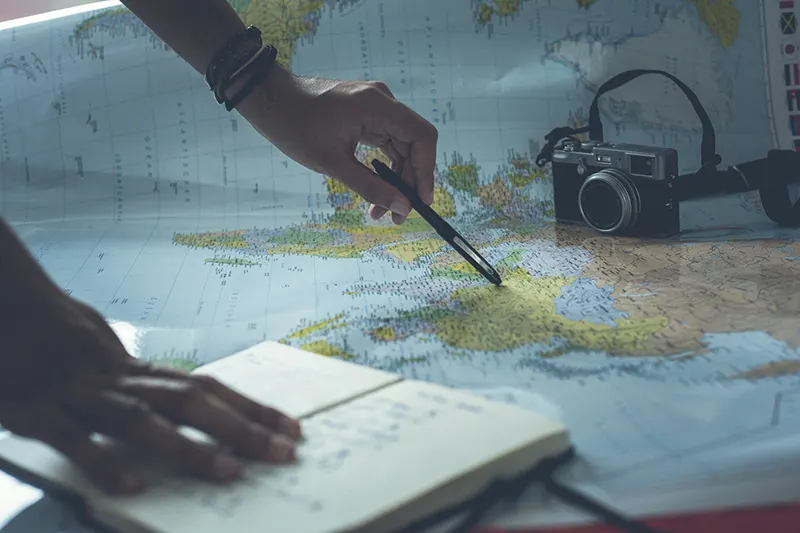
Factors to Consider When Planning a Route
Some factors to consider when planning a route are distance, time sensitivity, downtime (breaks), and unexpected delays.
You must consider how far you plan to travel and how long it will take to reach your destination. You will also need to consider the breaks you will have to take during your trip and unexpected delays like accidents.
Techniques for Planning a Route
Route planning is the ability to create or plan out directions for multiple distances on a map.
These distances or destinations are placed in a logical order for convenient navigation. Here are three common techniques for route planning:
1. Dynamic Route Planning. This method identifies routing problems that may arise and can reroute quickly.
2. Multi-Stop Route Planning. You can plan your route with several stops in between, which gives you time to determine the best route and predict arrival estimates during the whole route.
3. Closed Path Routing. This route planning technique allows you to start traveling from the first point, and your travel ends somewhere near the first point.
Estimating Distance and Time
Efficient route planning involves estimating how far your trip will be and for how long. There are two ways to estimate distance – Timing and Pacing.
Timing is the easiest to do, but is the least accurate. Pacing, on the other hand, is laborious and time-consuming but is more accurate.
Timing your travel is about speed. This is an important consideration when planning to walk to complete your route. Though, the results can only estimate your walking pace varies.
Contingency Planning
A contingency plan is important for all trips or land navigation plans. Contingency planning involves creating several alternative routes in case your initial route cannot be followed.
Tips for Successful Land Navigation
Staying Oriented
During land navigation, always stay alert and oriented. You may encounter several obstacles along the way.
If you can detour from such obstacles, it is best to do so. Accidents can happen anytime, which can delay your travel.
Using a Pace Count
A pace count is a great way to help track the distance you have traveled. Using pace count beads is a great help.
You can practice by measuring a 100-meter line and start walking on this line numerous times to get an accurate count.
It is best to practice pace counting on a flat surface, climbing a hill, or in a place with many vegetation and trees.
Keeping Track of Progress
Even if you have read the map and carefully planned your route, it is still possible to encounter problems during land navigation. That is why it is essential to constantly track your progress during your entire trip.
Keep tracking your position to determine if you’re going the right way. You wouldn’t want to waste time going around in circles.
Conserving Energy and Water
When traveling, especially by walking, you need to conserve your energy and water supply.
Even with careful planning, there are still obstacles and unexpected problems that may occur.
When such obstacles arise, you must use energy, and your body will ask for water. Always consider a route that can conserve your energy and water supply when planning.
Conclusion
This article is a brief guide on how to read land navigation. Reading is not enough. You have to go outdoors and apply what you have read to feel confident about doing land navigation.
Go out and grab your map, compass, protractor and pencil. You will never learn until you actually do it.
Mistakes are part of learning. Learn from them while you are practicing because when you are out in the great outdoors, you are the only one who can truly save yourself.