Sprouting seeds in a jar is a simple and rewarding method of harnessing nature’s potential to unlock a powerhouse of nutritional benefits. Whether you’re an experienced gardener or a prepper, sprouting seeds offer a convenient and cost-effective way to enjoy fresh and nutrient-rich sprouts throughout the year.
In this comprehensive guide, we will walk you through the step-by-step process of sprouting seeds in a jar, from selecting the right seeds to harvesting and storing your sprouts.
Quick Navigation
- Understanding the Benefits of Sprouting
- What Types of Seeds are Best for Sprouting?
- How to Prepare The Jar
- How to Prepare The Seeds
- Rinsing and Draining
- The Sprouting Process
- Harvesting and Storing
- Conclusion
Understanding the Benefits of Sprouting
Before diving into the practical steps, it’s important to grasp the remarkable benefits that sprouting seeds offer.
Cost-Effective: Sprouting your own seeds is an economical choice. Purchasing sprouting seeds is generally more affordable than buying pre-packaged sprouts from the store.
Moreover, a small number of seeds can yield a large quantity of sprouts, providing you with a cost-effective source of fresh produce.
Assurance of Quality: When you sprout your own seeds, you have control over the quality of the seeds and the sprouting process. You can choose organic, non-GMO seeds that are free from chemical treatments or pesticides.
This ensures that you are consuming sprouts that are of the highest quality and free from any harmful substances.
Freshness and Flavor: Nothing compares to the taste and freshness of homegrown sprouts. By sprouting your own seeds, you can harvest sprouts at their peak of freshness, maximizing their flavor and nutritional content.
The vibrant and crisp texture of freshly sprouted seeds elevates your culinary creations and adds a delightful element to your meals.
Variety and Customization: Sprouting your own seeds allows you to explore a wide range of sprout varieties that may not be readily available in stores.
You can experiment with different types of seeds, from alfalfa and broccoli to lentils and mung beans, tailoring your sprouting experience to suit your taste preferences and nutritional needs.
The ability to customize your sprouts adds excitement and diversity to your meals.
Control over the Sprouting Process: By sprouting seeds at home, you have complete control over the entire sprouting process.
You can ensure proper sanitation of the equipment, monitor the rinsing and draining process, and adjust the sprouting conditions to create an optimal environment for growth.
This level of control minimizes the risk of contamination and promotes healthy sprout development.
What Types of Seeds are Best for Sprouting?
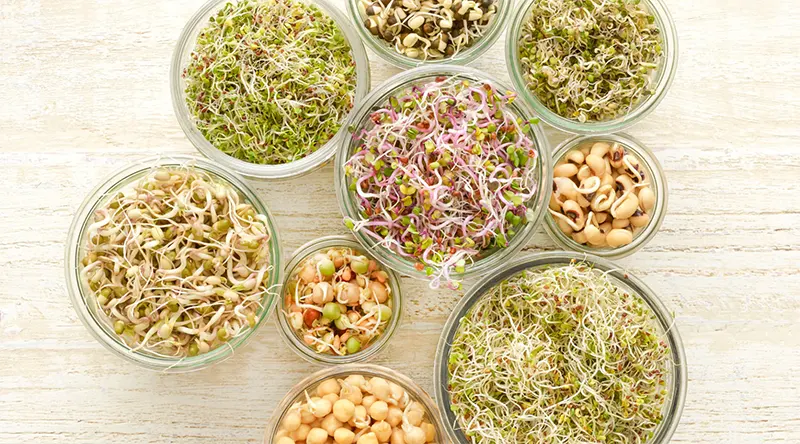
There are a variety of seeds that can be sprouted, but some are more popular than others. Here are six of the most common types of seeds used for sprouting:
Alfalfa: Mild and nutty, alfalfa sprouts are packed with vitamins and minerals.
Mung beans: These sprouts have a sweet, nutty flavor and a crunchy texture.
Lentils: Peppery and protein-rich, lentil sprouts are a nutritious addition to any meal.
Radish: Spicy and tangy, radish sprouts are a good source of vitamin C.
Broccoli: Slightly bitter and high in antioxidants, broccoli sprouts are a great way to boost your diet.
Wheatgrass: These sprouts have a sweet taste and are loaded with vitamins and minerals.
When choosing seeds, be sure to select those that are labeled for sprouting. This ensures that they have been tested and will sprout successfully. Organic and non-GMO seeds are also a good choice.
You can find sprouting seeds in your local health food stores, natural grocery stores, or online. Look for high-quality seeds that are labeled organic and non-GMO.
You can also purchase seed sprouting kits that come with everything you need to get started.
Now, how many seeds will you need?
The answer will depend on the size of your jar and how many sprouts you want to produce. As a general rule of thumb, use 1–2 tablespoons of seeds per quart-sized jar.
How to Prepare The Jar
You can use any type of jar for sprouting, as long as it has a wide mouth and is made of glass. This allows for adequate air circulation and prevents mold from forming. Mason jars with metal mesh lids are a popular choice.
Before using your jar, wash it in hot, soapy water and rinse well. To sterilize the jar, place it in a pot of boiling water for 10 minutes. Alternatively, you can run the jar through a hot dishwasher cycle.
If using a metal mesh lid, wash it in hot, soapy water and rinse well. You can also soak it in a 1:10 vinegar and water solution for 10 minutes to further sterilize it.
How to Prepare The Seeds
At this point, you should be soaking the seeds. How do you do that?
To soak seeds, place them in a jar and cover with water. The water should be at least twice the volume of the seeds. Soak the seeds at room temperature and away from direct sunlight.
So, how long should you soak your seeds to get fresh sprouts? Well, it depends on the type of seed. Soaking isn’t entirely different whether you’re working with mung bean sprouts or green pea sprouts.
Here’s a quick reference table to guide you:
| Seed Type | Soaking Time |
| Alfalfa | 8-12 hours |
| Lentils | 8-12 hours |
| Chickpeas | 8-12 hours |
| Mung Beans | 8-12 hours |
| Sunflower seeds | 8-12 hours |
Don’t forget to use the right type of water. Using filtered water is important because it reduces the risk of contamination and ensures that your sprouts are safe to eat. Chlorinated tap water can inhibit sprout growth and affect flavor.
Rinsing and Draining
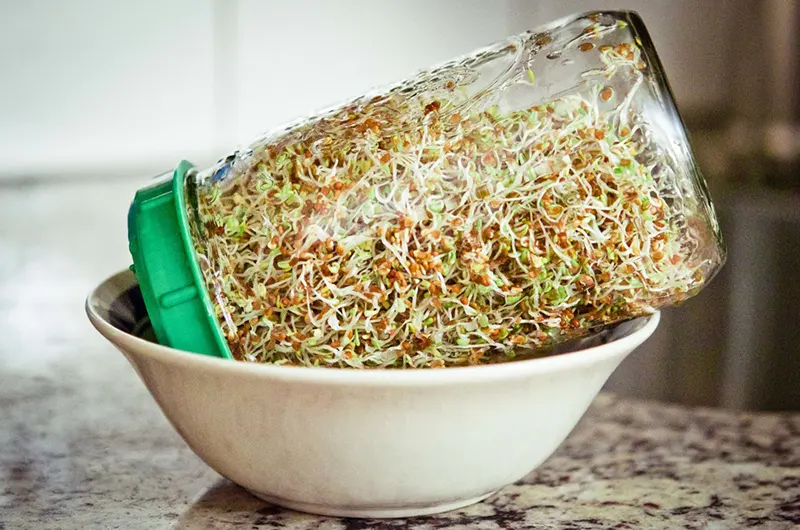
After the soaking period, drain all the soaking water from the jar by tipping it at an angle or using a fine mesh strainer. Rinse the seeds thoroughly with fresh, filtered water as a final rinse.
Gently swirl the seeds around to ensure even rinsing. Drain the excess water completely to avoid stagnant moisture, which can lead to mold or bacterial growth.
The Sprouting Process
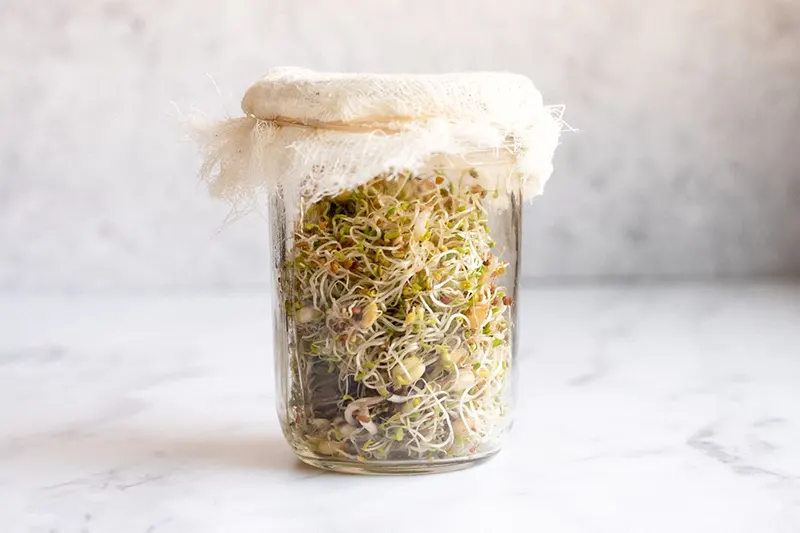
Place the rinsed seeds in your sprouting jars, such as your mason jar, and position them at a slight angle to allow air circulation and drainage. Cover the jar with the breathable sprouting lid or cheesecloth, securing it with a rubber band.
Find a suitable location, away from direct sunlight, with room temperature between 18 to 24°C (64 to 75°F).
For the next few days, rinse and drain the seeds twice a day, approximately every 12 hours. This process helps to maintain adequate moisture levels while preventing excessive dampness.
It is essential to ensure that the sprouts receive proper airflow during this period.
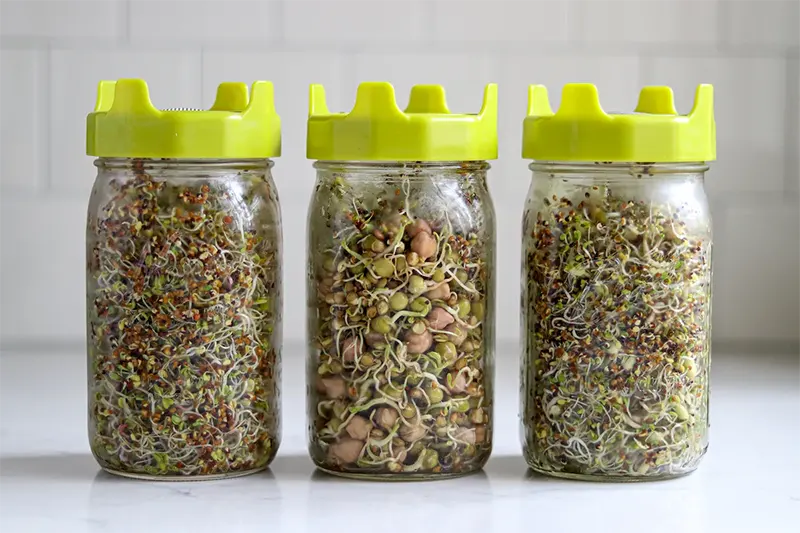
As the sprouts begin to grow, you will notice tiny roots and shoots emerging from the seeds. Continue the rinsing and draining process, and observe the seeds transform into vibrant and nutritious sprouts.
The duration of the sprouting process varies depending on the seed type, ranging from a few days to a couple of weeks.
Harvesting and Storing
Once the sprouts have reached the desired length, usually 2 to 4 inches (10.16 cm), they are ready for harvesting.
Carefully remove the sprouts from the jar and rinse them thoroughly to remove any residual seed hulls. Gently pat them dry with a clean kitchen towel or paper towel.
Consume the sprouts immediately for maximum freshness and nutrition. If you have excess sprouts, store them in a breathable container, such as a paper bag or a loosely covered container in the refrigerator.
Proper storage extends their shelf life for up to a week.
Conclusion
Sprouting seeds in a jar isn’t just a hobby or a dietary preference; it can be a life-saving skill in times of crisis. Add that skill to saving seeds for emergencies.
Growing your own sprouts provides a compact, renewable source of high-quality nutrition that’s independent of soil and weather conditions.
In the event of supply chain disruptions, you’ll have a continuous supply of fresh greens, ready to eat or to supplement your emergency food stockpile.
Furthermore, the growing sprouts in a jar requires minimal equipment and space, making it a practical technique even in the most confined survival environments.
As a prepper, knowing how to sprout seeds in a jar is an important skill to master.