Have you ever tried to make your vegetable garden? We did, and while ours wasn’t quite as successful as we hoped it would be, it is our start in a lifestyle shift towards becoming a bit more self-reliant and to go back to the basics of life. These are my first, very humble, steps towards self-sufficiency and homesteading so that one day, we can take a step back in time and sustain ourselves.
“You’re a prepper?” the woman beside me asks with just a hint of snide incredulity. To those who only understand prepping through the eyes of television’s Doomsday Preppers, I suppose I can understand the air of suspicion in finding out about the interests of a new acquaintance. Perhaps that same person believes that Tristan and Madison will live happily ever after once The Bachelor ends.
I would not consider myself a prepper. I’m not stockpiling canned goods and gold bars waiting for the collapse of the economy. Maybe I’ll be kicking myself in the behind later, but for now – I’m going to keep a certain amount of cautious optimism that things will work out alright. That doesn’t mean I don’t have an extensive plan to which I have made all of my friends and family agree in case of the zombie apocalypse…
I was raised by parents who came up in the original “back to the land” wave of the 1970s. They never gave up their jobs to go off-grid, but my father hunted and my mother gardened to supplement the family grocery bill. As a child, I fantasized about “pioneer times,” spending countless hours turning heavy cream into butter and daydreaming about going west in a wagon train.
40 years later, and the uncertainties of 1970’s America are still on our doorsteps. We’re still looking back at the golden days of the 1950’s, wondering why our wars can’t be as just, why our jobs don’t sustain our families, why our government is ineffectual at best.
With so many uncertainties in the world, I felt a draw toward greater self-sufficiency. I don’t prep for the day when the banks go broke and the internet disappears and the power grid goes down. I simply want to know that I have the skills to take care of myself and the people I care about if, for any reason, the lifestyle that I have become accustomed to changes. So am I a bug-out-bag-behind-my-front-door “prepper”? No. Will I be better off in an emergency situation because I am taking the time to learn heritage skills and self-sufficiency? Probably.
Becoming self-sufficient with a backyard vegetable garden
Last spring I decided to begin my stumble toward self-sufficiency by starting a vegetable garden. My husband and I enjoy a fairly average middle-class existence in that we are lucky enough to work jobs that provide us with a home of our own with a small backyard. Unfortunately, being fairly average middle class means that once the mortgage and bills are paid and groceries are purchased, there isn’t a whole lot let over. It’s easy to put off new projects when priorities lay in making sure the bills are paid on time. When I began my garden, I had a shoestring budget. We have a Home Depot credit card with a low limit for emergencies, so I had to keep the budget as small as possible. The worst path toward self-sufficiency is by borrowing money.
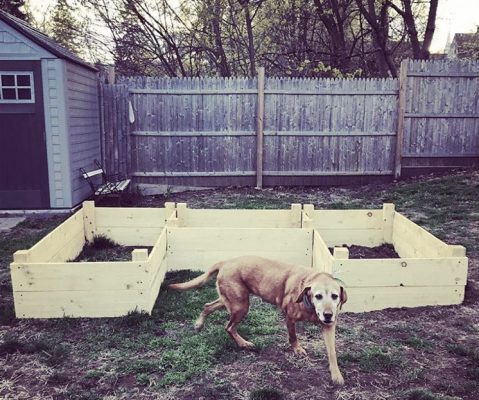
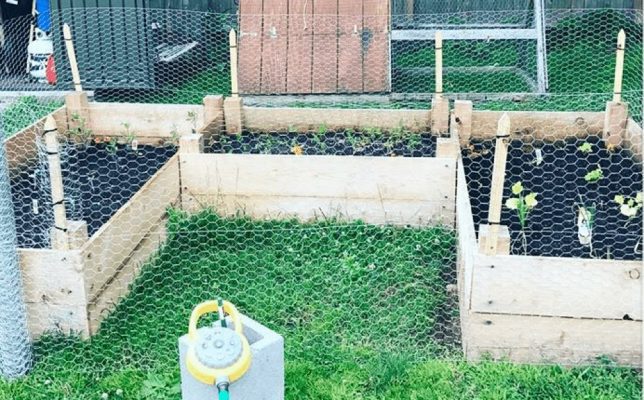
1. Building the vegetable garden base
I purchased enough untreated lumber to build two 4’x6’ boxes and one 3’x4’ box. The total for the lumber and screws came to about $60 which went on the credit card.
The boxes went together fairly quickly and with the help of a friend, my husband was able to level them into our slightly unleveled backyard.
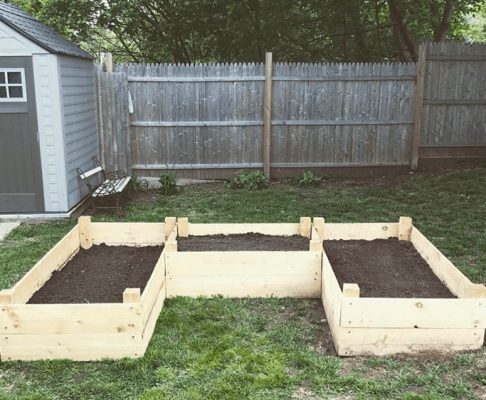
2. Choose the right nutritious soil
The next step, a few weeks later, was to add the soil. I spent hours online pouring over the best and cheapest way to fill our vegetable garden boxes. Since this was my first time out and I had that fantastic plastic from Home Depot, we decided to go from the big box store for the soil by the bag. I settled on a mix of 60% composted cow manure, 20% peat moss and 20% sand, which I found on a YouTube video that boasted excellent old-timey banjoes in the background. How could they not have all the answers with old-timey banjo music to back it up? We emptied the bags into each box, layering manure, peat, sand, manure and then turning it all over to mix it up well. I honestly don’t remember what this step cost but it wasn’t cheap.
Fortunately, I had my trusty Home Depot credit card. Unfortunately, it was definitely more than I had wanted to charge at any one time on my trusty Home Depot credit card. That week we ate Ramen.
3. Choose the right vegetables to grow
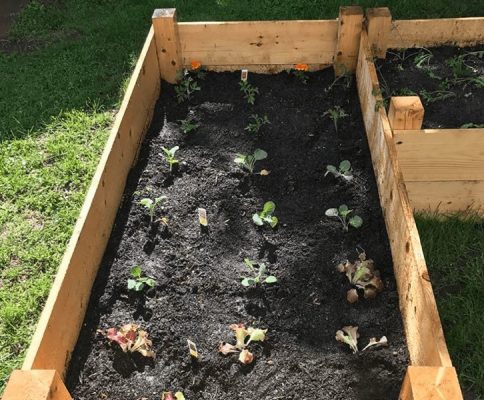
The next step, several weeks after building and filling the boxes, was to pick our sweet baby plants that would definitely, no questions asked, grow into a bountiful vegetable garden.
We went to the local garden center (NOT home depot) and I lost my tiny mind with all of the choices of things we could grow. I bought enough, to say the least. The vegetables and other plants we bought were:
- Tomatoes
- Broccoli
- Cauliflower
- Scallions
- Onions
- Cucumbers
- Cilantro
- Parsley
Actually, we bought more than that. I don’t even know what else to fill 20 more boxes, let alone my three. $50 later I was squashing my plants into the soil, feeling like a real live farmer.
I have to say… it looked absolutely beautiful – everything lined up in their neat little rows. I had done a good job…

4. We are not the only ones that eat from a veggie patch
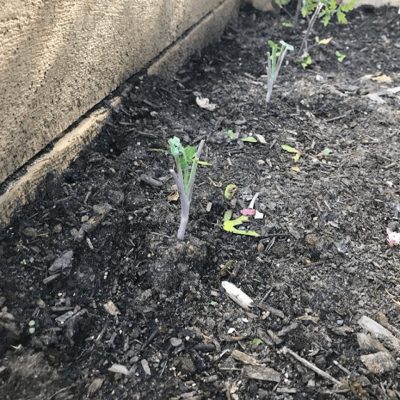
All was going well. But then the bunnies came; little adorable bunnies in the night nibbling all my lettuce and broccoli leaves down to sad, sad stalks. Back to Home Depot for chicken wire and stakes.
More expenses slapped onto the credit card. If the bunny trouble wasn’t bad enough, nothing else really appeared to be growing. Everything seemed lethargic and wet.
The soil was so dense, and it was raining all the time, and that cardboard I put down to stop weed growth just kept all the moisture in the soil. So we grabbed some spray on miracle grow for vegetables and my dreams of becoming an organic farmer went right out the window. I’d rather have inorganic veggies than no veggies at all.
5. Don’t crowd your vegetable garden
Fortunately, after the fence was built the lettuce seemed to bounce back with the help of the delicious miracle grow. Unfortunately, the broccoli and cauliflower never really regained life. About this time I realized how unbelievably overplanted the vegetable garden boxes were. I had to make some hard decisions about what would stay and what would go. The soil only had so many nutrients to feed my plants. Better to lose some than lose all.
Over the course of the next few weeks, as my tomatoes, zucchini, cucumbers, carrots, and lettuce seemed to be flourishing, anything that had never recovered from the bunny incident was pulled. While it was hard to make these decisions, I was glad to make room for the plants that were taking off.
By July, we were finally starting to get some pay-out from the vegetable garden. The red leaf lettuce was my best and most pleasing produce. We had several salads from that lettuce which my husband deemed better than the grocery store lettuce – even when we found some dirt that had not come off when we rinsed it.
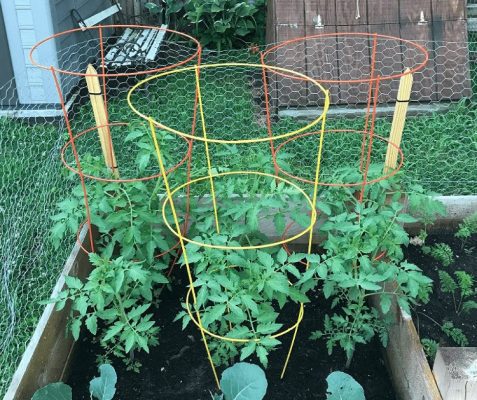
We had an abundance of tomatoes but as I had planted too many plants too close together, they didn’t receive as much sun as they needed and many of the tomatoes never turned red. I made some delicious tomato salsa verde out of them, but it wasn’t the same satisfaction as a plump, red beefsteak on a hot August day.
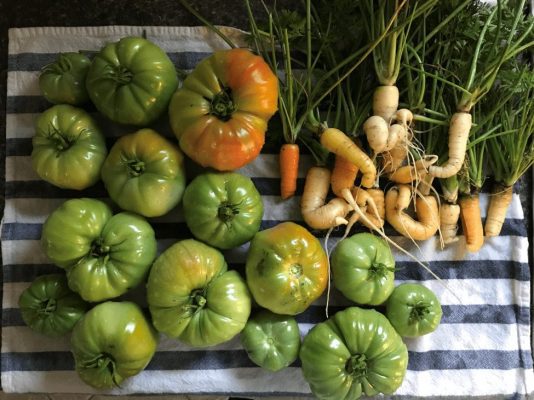
We got three weird, small cucumbers which were always nibbled by the chipmunks the day before I was going to pick them. Talk about Murphy’s Law! What I thought was going to be beautiful zucchini turned out to be weird pumpkin looking squashes. We put them on the doorstep as fall décor but never tried eating them. The carrots… well – have you ever seen Harry Potter? They looked remarkably like the Mandrake roots, all shriveled and white and screaming. I cut them up and roasted them with some salt and pepper and at them as a snack. They were delicious, but it was not exactly a bounty.
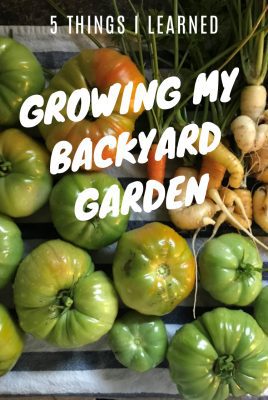
In hindsight…
So here we have it… my first year vegetable garden on a shoestring budget was an utter failure for a number of reasons:
1) Poor location – When I was planning the garden I made two huge mistakes. Firstly, I took my husband’s concerns about not being able to run the lawnmower around the vegetable garden’s boxes into account when choosing my placement. I didn’t make the placement of the boxes the priority. The second mistake was one of oversight; the spot in the middle of the yard, which left him plenty of mower clearance on all sides seemed fine in the early spring when we were building and filling the boxes, but when time came to plant, the tree in our yard had grown its leaves and left half of the garden in shade half of the day. As I can’t really change the location without it becoming a huge project, I will make sure that the plants I select for that side of the vegetable garden will flourish in a shadier environment.
2) Poor soil – I went the cheap route and while I thought I had done my homework on the best soil combination for the least amount of money, it ended but being very dense and lacking the nutrients my vegetable garden needed. This year I will do more research and more legwork, seeing if I can buy some healthy local compost to add to the soil. Also I will start my own composter… it’s on the list!
3) Too many veggies – I was so excited about all the growing possibilities, I didn’t stop to think about how much my boxes could really handle. I overstuffed the boxes and all of my crops suffered because of it. This season I will only grow what I know I will use with regularity. I will also try to stick to plants that will produce more than one piece of fruit or vegetable (tomatoes, peppers, etc. rather than broccoli and cauliflower.) At this point if I only have tomatoes and lettuce but they are abundant and delicious I will be happy. I may try to add in a few other things, but I’m going to try really hard to not overdo it again.
4) Don’t give up – As with most things in my life… I loved the idea of a vegetable garden, but the day to day monotony of plucking weeds, trying to figure out when to water or not water, trying to decide to keep or to scrap and why the HECK NOTHING IS GROWING got the best of me. There were days at a time that I would look at the garden lovingly through my back kitchen window, but wouldn’t go out and tend to it. I was frustrated that I wasn’t immediately good at gardening. I had thrown a bunch of money (that I didn’t have) at it… why wasn’t it working? This year, I’m hoping that by setting up a strong plan, executing the plan mindfully, and getting myself into the habit of trying to enjoy my garden rather than only liking what it produces for me, I will be far more successful.
The initial outlay of costs for the vegetable garden was probably about $350 between building supplies, soil, plants, fencing supplies and the dumb gadgets that I purchased to try to make the gardening easier (don’t ever bother with an automatic waterer… the dumb thing broke in a week!). Fortunately for this year, I think I can probably get away with about $100 more investment between additional fertilizer/plant food and the plants. I’m hoping that with the lessons that I learned from my first year the payoff of gardening will be worth the investment.


I am not a pro gardener at all, but we built 12 garden boxes for $35 each. They are 8′ x 4′ and then a 13th one that is about 10′ x 4′ (for my perennial asparagus).
We made a section in our yard specifically for our garden, and put down fabric and in between the boxes we have mulch.
We went to a local recycling place and got a ton of 50/50 mix (black dirt and compost) for super cheap….
Most all that I plant is from seed (and I save my seeds for planting the next year). Only broccoli, peppers, tomatoes and one “new thing to try” do I buy as starts, vs from seed.
I save my eggshells throughout the year and crush them to a fine powder and use as fertilizer. I do not use the poisonous miracle gro, since I want to eat HEALTHY…
This is our 3rd Spring in this house, and our 3rd year planting. We also have 10 fruit trees, and a little section for chickens that I hope we can get sometime this year or early next year.
I also have a large permaculture garden that is filled with medicinal and culinary herbs, flowers, roses, etc. Each plant either has a medicinal or culinary use, or it is pretty. And I got all those plants super cheap or free. We have chives, parsley, oregano, mint, lemon balm, feverfew, chamomile, yarrow, comfrey, etc etc. I dry and tincture the medicinals and dry and store the culinary herbs throughout the summer.
If you lived near Boise, ID I have a ton of free starts and I need to split a ton of other plants.
I have been giving away horseradish, chives, scallions, walking onions, leeks, catnip, and yarrow all week long so far.
We are only on a lot size a little more than 1/3 acre, like 0.36 acres. And we still have a ton of grass for our dogs to run around on.
I wish I could get some starts from you!
And great idea with the eggshells. I only just found out about this recently and have been using them with some of my coffee grinds as a fertiliser and it works wonders for the plants!
You definitely sound like a pro gardener to me!
Thanks for writing in.
I’ve recently gotten into gardening myself. I’ve not only been on a more self sufficiency kick in the last few years but a health kick as well. What better way to eat better than grow your own food? Sadly for me I live in a town home with not a whole lot of ground and 2 large dogs. So space is a premium. I have found totes and five gallon buckets to work pretty well though.
It can be disheartening when your plants die but hey that’s why you plant a bunch. I like to start my seeds in paper towels and transer the sprouts to peat pots that can be buried in the dirt once the plant is large enough. It’s a great way to get a head start on plants like zucchini that can’t be planted until after the last frost date.
This was a very informative article and look forward to more!
Cheers Henry! I’m a bit of a fiend for this too. Prior to Spring, our dinner table is often covered with pots and trays of young little seedlings as I try to get that head start on the growing season. Try doing tomatoes indoors – you can really get those things absolutely climbing before Spring kicks in and practically have trees once the sunny season starts!
Thanks for writing in!
I started my seeds indoors this year. I didn’t start tomatoes but I will keep that in mind for next year! I started zucchini indoors this year and they already have some size to them. Just transplanted them.
When I build my boxes I put a layer of hardware cloth (its that heavy metal screen with 3/16″ square holes) in the bottom then a 1″ to 2″ layer of gravel in the bottom, this keeps the moles from attacking the roots. Then I put in old wood from dead rotting limbs and such to build up a base so I dont have to use so much store bought soil. The rotting wood will turn into soil anyways. Throw in coffee grounds and egg shells too.