When living away from home doesn’t go precisely as expected, a prepper should survive and live safely anywhere, anytime. Knowing what to do is the first step to survival in the wilderness. To stay warm and secure in the wild, you must be able to gather food, create a tiny fire, and— most importantly— build a survival shelter.
The best shelter to make in the wild will depend on various factors such as the weather, location, resources available, environment, and personal needs. Natural shelter, debris, tarp, and winter shelters are a few examples of typical shelter designs.
Continue reading to explore the different designs of shelters you can make in the wilderness and some additional tips for choosing the best survival shelter for your circumstances.
Quick Navigation
- Things to Consider When Choosing A Shelter
- Choosing the Right Spot
- Different Types of Shelters and Examples
- Additional Tips and Tricks for Shelter Building in the Wild
- Conclusion
Things to Consider When Choosing A Shelter

There are vital things to consider when choosing survival shelters to build in the wild.
Climate and Weather Conditions
In building a survival shelter, it is vital to consider the environment and weather. To keep you dry, warm, and secure, the shelter you must construct should provide defense against rain, wind, deep snow, and freezing temperatures.
If you are in a hot region, you may require ventilated shelter and shade to keep from overheating.
The shelter should shield you from the elements and be in a specific region where natural disasters like landslides, floods, or fallen trees won’t impact.
Also, the layout of your survival shelter has to conform to the particular weather conditions you’re experiencing.
Location and Surrounding
In an actual survival situation, you may only have little time or energy to find an ideal shelter location.
Think about the Five W’s while choosing a location for your survival shelter. These include wood, water, wildlife, wind, and widowmakers.
Choose a place as far away from the wind as possible, since the wind brings in the weather, which you seek refuge from.
In the survival domain, dead trees are widowmakers because they may fall on you. In other words, avoid choosing a location adjacent to many dead trees still standing.
Additionally, wildlife may make staying in a survival shelter unsafe and uncomfortable. Stay away from anthills or animal trails; be aware of them.
Water is two-fold in that you need a dry space and want to avoid being in an area where it may collect around you. Water shouldn’t be inside your shelter, but having it close by makes life easier.
Don’t undervalue water’s strength, however. If it rains overnight and you are too near to a stream, the stream may cause your demise.
The last of the 5 Ws, wood, is crucial. Find a location with different sizes and kinds of fallen wood. It takes too much energy to build a shelter while moving heavy quantities of wood back and forth.
Available Materials
When building a survival shelter, material availability is a crucial consideration. The resources you have and the area you are in will determine the materials you employ to construct your home.
In a forest, you can easily access many tree branches and leaves that you can use to build a shelter. You could use sandbags, pebbles, or other natural items in a desert or rocky terrain.
Choosing materials that are dependable, strong, and able to survive the conditions you’ll probably encounter is crucial.
Use materials that can tolerate water damage, such as treated timber or waterproof tarps, if you live in a rainy location.
Size
The number of people it must house, the location and weather, and the construction materials available are just a few of the checklists that will determine the optimal size of a survival shelter.
A survival shelter should generally be large enough to comfortably fit the individuals using it without being so big that it becomes challenging to build or maintain. A survival shelter should have efficiency and compactness in mind.
Bigger shelters could be required in some instances, such as long-term survival scenarios, to house more people or to provide more room for storing food, water, and other supplies.
Insulation
The ideal plan during construction is to work your way from the ground up. After deciding on a place, insulate the ground by employing natural materials.
These organic materials might range from dried-out bark, leaf hut, layers of dead leaves, pine needles, and other adjacent plants.
Use a sleeping bag, pad, or emergency blanket if you have one with you. The insulation should be thick, which applies to everything, not just the ground.
After constructing your shelter, you will add additional debris to the shelter’s walls to continue the insulation.
Ease of Construction
In a survival emergency, time is often of importance, making it crucial to choose a shelter design that is comparatively simple to build.
You should choose a design that you can put together using simple equipment and materials that are accessible in your area.
You may build a shelter that satisfies your basic requirements quickly and effectively using a simple design.
Protection
The main goal of a survival shelter is to keep you safe and protected.
A decent shelter design should be in a safe and stable region that is unlikely to be influenced by natural disasters like landslides, floods, or fallen trees and should give appropriate protection from rain, wind, snow, and high temperatures.
Privacy
You may also need a spot to stay that provides some level of both privacy and security.
A good shelter can shield you from unwanted attention from animals or other people, while making you feel more at ease and secure in your surroundings.
Visibility
You may want a shelter seen from a distance to call for assistance or to let others know where you are.
Alternatively, you want a concealed or hidden shelter to evade animals or other humans. Depending on your requirements, you may choose a shelter design that is more or less noticeable, fits in with your surroundings, or sticks out.
Choosing the Right Spot

Now that you know the vital things to consider when choosing a shelter, it is crucial to choose the ideal location.
Your survival shelter has to be in the driest location you can locate. Nothing drains body heat as quickly as moisture.
Select a dry and level area. Especially if it is pouring or going to rain, this will keep you comfortable.
A dry area will also make it easier to light a survival fireplace. If you build your survival shelter on a slope, you run the danger of flooding or having your shelter swept away by the flow.
Avoid locations near cliffs or in caverns with sagging roofs or at risk of rockfall. A few rocks might fall more quickly in the rain and snow.
Dry tree limbs and branches are not the best places to find cover, since they can snap readily in the case of high winds or a storm. Choose a location that will shield you from strong winds in a desert, such as the windward side of a hill.
Different Types of Shelters and Examples
There are four basic categories of survival shelters.
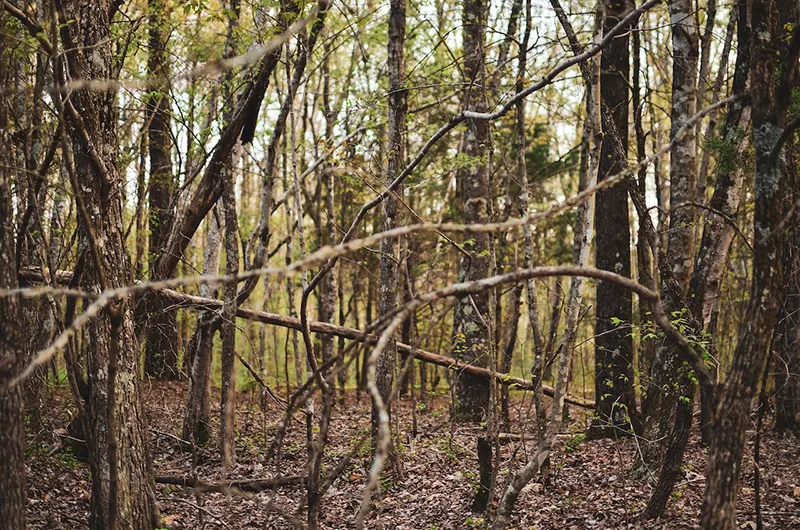
Natural Shelters
Naturally occurring survival shelters are your fastest alternative if you are in a last-minute survival crisis, such as being lost and having little time to build a shelter since it is becoming dark or it will start raining soon.
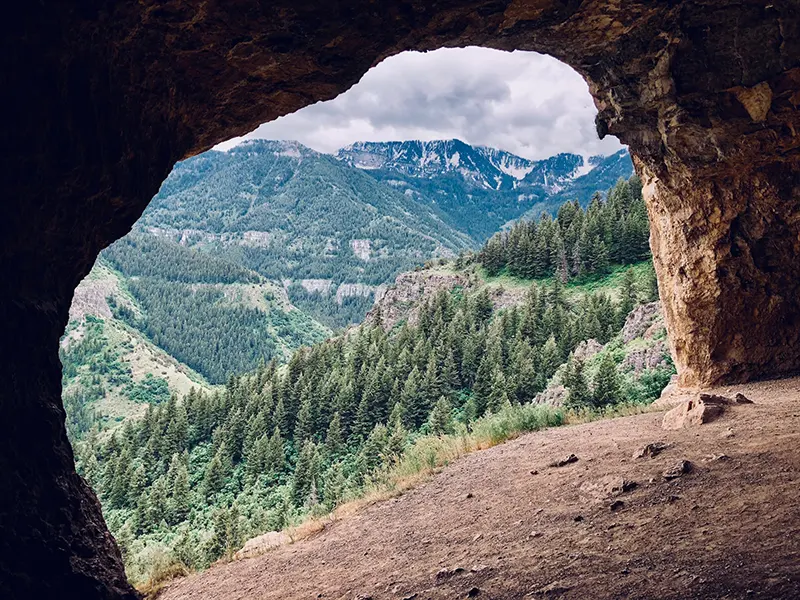
Caves
Caves are ideal for a winter survival shelter with a fireplace due to their natural structure. Unlike other survival shelters, you don’t risk setting the building materials on fire.
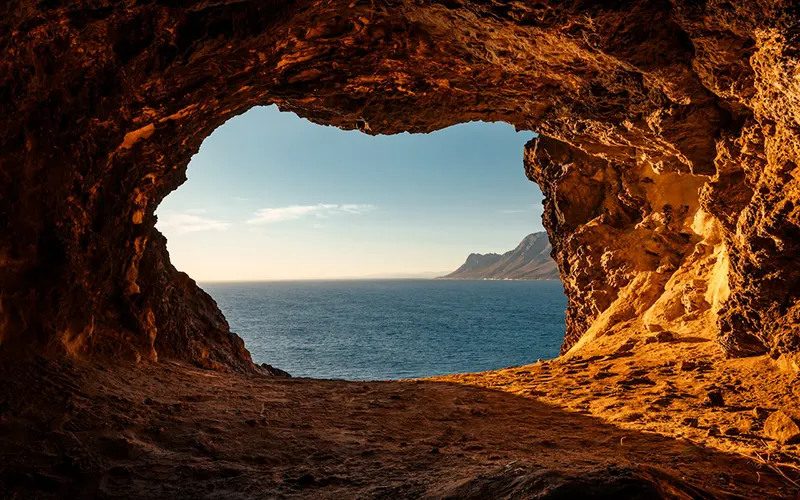
The only issues you could encounter with caverns are floods, bat infestations, or collapse.
Before establishing the cave as your refuge, you must check it for these threats. Also, be as near the door as you can in case you need to flee in an emergency.
Under the Fallen Tree

The most basic kind of shelter is a fallen tree with space below it for you to climb inside. To create a wall, lean branches against the tree’s windward side (so the wind is blowing into it rather than against it).
Build a wall with a thickness that will block the wind. The heat from a fire will keep you warm if you can make one on the exposed side of your shelter.
Cocoon (Leaves, Bark, and Pine Needles)
If you can quickly gather dry material (leaves, bark, and pine needles) from the forest floor when it is too late in the night, construct a mound two to three feet high and taller than you when lying down.
Burrowing into the pile turns you into a heat-insulating natural sleeping sack.
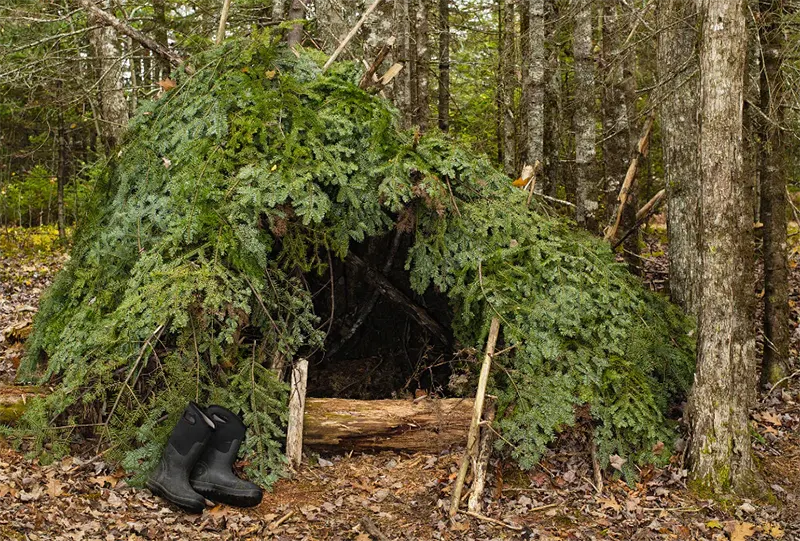
Debris Shelter
A form of survival shelter called a debris shelter is constructed entirely from local natural resources.
This shelter is often used in wilderness survival scenarios when an individual or group must rapidly construct a shelter using only local debris and resources.
Lean-to Shelter
You may construct a simple lean-to shelter if you come upon a fallen tree with insufficient space underneath it, a rock, or a little overhang.
To begin building a wall, lean fallen limbs on the structure, which should look like the upper edge of an overhang.
To help block occasional rain, slant the tree’s limbs. Conceal the sagging limbs with leaves, pine needles, bark, or anything else the forest has to give.
You may enter your shelter by crawling beneath after constructing a sturdy wall. Always build your shelter large enough for you and anybody else with you.
You can also construct a lean-to shelter with two forked prop sticks. Make a belt or boot laces tie to connect the sticks’ ends.
Add extra sticks to the horizontal stick to bolster it. Next, build a barricade of leaves and other forest material against the leaning sticks.
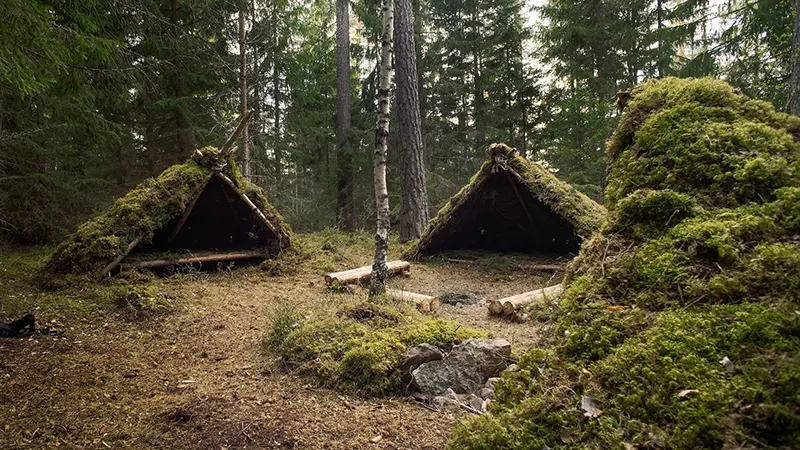
A-Frame Shelter
A-frame shelters are an excellent alternative to lean-tos. A-frame requires only two sticks to construct. Place the two shorter sticks such that they form the letter A.
Place the longer stick upright at the A’s top. Where the three sticks converge, tie them together. The three sticks will resemble an A-frame tarp shelter with one end folded on the ground.
As you continue, stack additional sticks against the longer stick and more forest debris against the sticks to create an open shelter with insulation at the top.
A Debris Hut
With one end of the ridgepole on the ground, this simple A-frame modification creates a closed triangular construction with a little hole. Remember that this type of shelter needs to be big enough just for you.
Since all the heat will originate from your body and be confined within, you must limit space to maintain internal temperature.
To prevent the effects of conduction, a layer of leaves and other debris on the ground should be at least four inches thick when compacted. Once inside, you may use your pack to seal the entranceway so that it acts as a trap door.
Tarp Shelter
A tarpaulin, a rugged and waterproof material often used for outdoor camping, is used to construct a tarp shelter.

Large tarp shelters are popular with outdoor enthusiasts because they are simple to build and provide rapid and reliable weather protection.
Wedge Tarp
A location with a consistent cold wind is excellent for this tarp shelter. The wedge has an aerodynamic form that should withstand even the worst winds and downpours.
Stake down two of the tarp’s corners (not its opposing corners) towards the wind to construct the wedge-shaped tarp shelter.
Then secure a line to the middle of the tarp’s opposite side. Tie the remaining two corners so that they point downward. Use more cable and a less steep angle for open wings and improved airflow.
The Tarp Burrito
A tarp burrito is an easy shelter with an installation time of less than an hour. Set up your tarp in a potential shelter area.
About one-third of the way, fold one side over. Fold once more while continuing in the same direction. The seam beneath creates a roll of the tarp as a result.
Place your sleeping bag into the open end of the tarp after tucking one end under itself to shut it off. With this arrangement, all seams are down by the weight underneath you. When it’s rainy, let it droop down; when it’s nice out, prop it open.
Tarp Tipi
The debris tipi shelter, one of the most adaptable and frequently constructed primitive shelters ever used by Native Americans, may be constructed with only a little rope, a few poles, and a tarp.
To secure the first three or four poles, tie a few straight poles together with rope or hook a few forked poles together.
Then arrange additional poles in a circle around the main supports. Pull the tarp or other covering into position, then securely fasten it. Aim to size the structure such that the tarp fully encloses it.
Winter Shelters
No doubt, making shelter will be your primary priority in a winter wilderness emergency.
Hypothermia may set in mere minutes in the bone-chilling cold weather. Fortunately, there are many survival shelter designs that you may construct in a frozen ground with just a few simple tools.
A Snow Cave
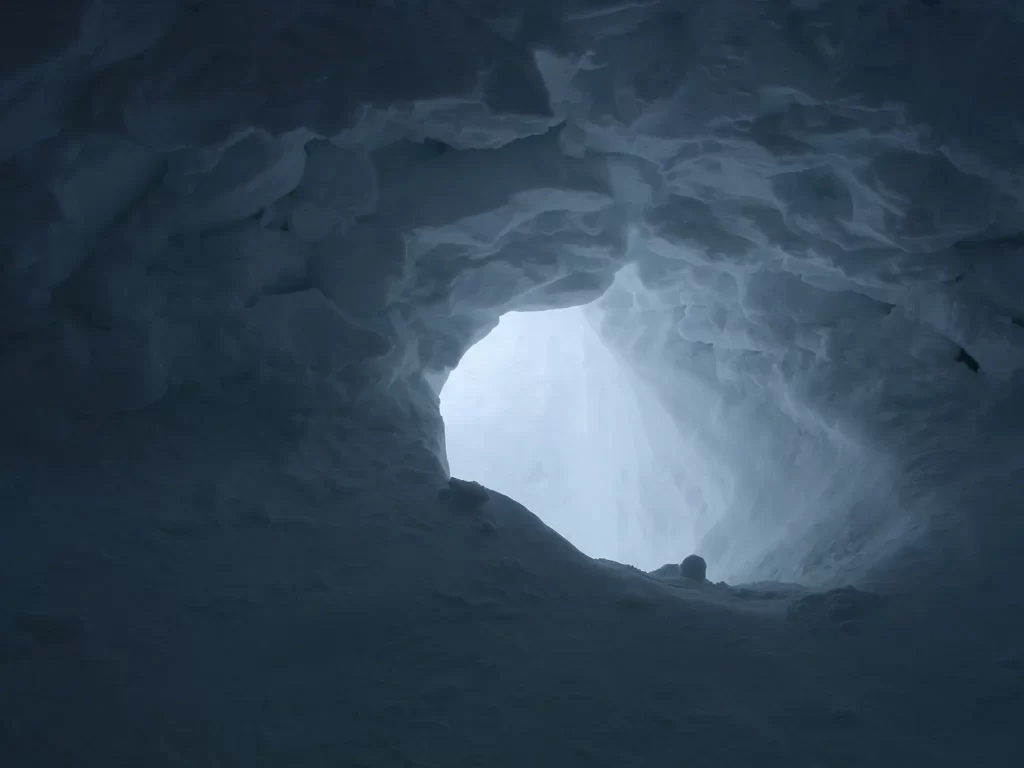
The only shelter possibility in locations with pile snow is a snow cave. Yet one might experience low oxygen levels or bury alive if the roof falls, making this kind of shelter often the most hazardous. Selection of the snow is crucial because of this.
Pick a bank or drift of snow that is deep and stable. Create a tunnel into a low area by digging through the side of it.
This area is known as the “cold well,” where the cold air may fall and gather. Make a tiny ventilation hole approximately 6 inches (ca. 15 centimeters) in diameter in the ceiling, particularly if you want to cover the entryway with a large piece of snow or a rucksack.
A Quinzee
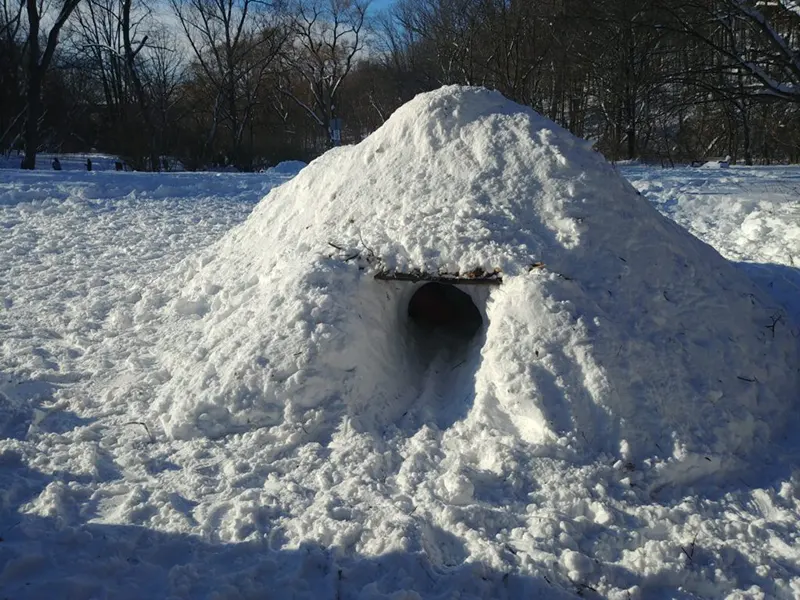
The quinzee is a dome shaped snow shelter resembling an igloo but is considerably simpler to build. Unlike making an igloo requiring a consistent snow texture, various kinds of snow are possible for a quinzee.
To construct a quinzee, stack some mobile equipment, such as backpacks, under a tarp. Cover the gear and tarp with snow, and pack it down until the snow is approximately 2 feet deep.
Surround the dome with three or four dozen 12-inch-long sticks. Dig through the snow within the mound to each stick’s base to guarantee that the dome is of a constant thickness. Then, drill a fist-sized ventilation hole in the quinzhee’s ceiling.
Snow Trench
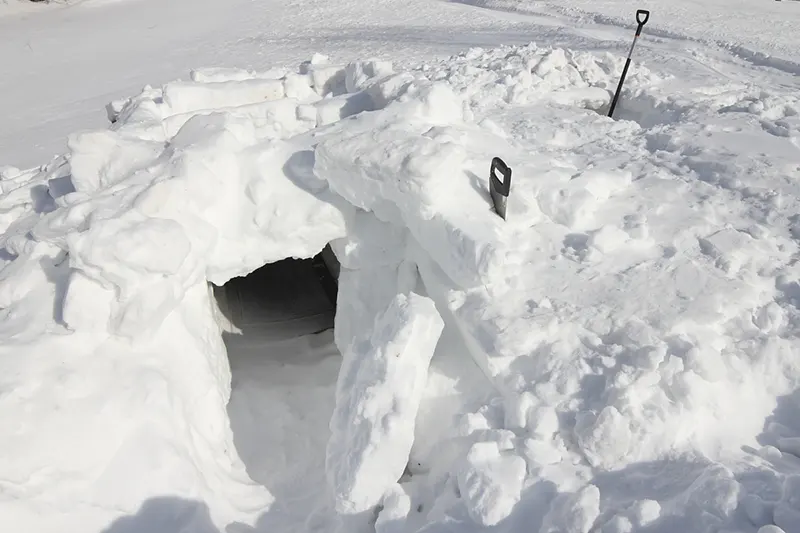
You can use a saw to cut off blocks to build a trench if the snow is firm enough to cut into slabs, and then arrange the blocks so that they look like a roof to cover the trench.
You can still dig a trench and cover it with a flat roof made of poles, tree boughs, and an insulating layer of snow if the snow doesn’t stick together to form sturdy construction blocks or if you have no tools.
The snow trench is excellent for rapid one- or two-person snow shelters in flat settings.
Here’s a pros and cons table comparison for different shelter types:
| Shelter Type | Pros | Cons |
| Natural Shelter | – Already exists in the environment- Can provide some natural camouflage and cover | – May not be as comfortable and safe as man-made shelters |
| Debris Shelters | – Can be built quickly and easily using natural materials found in the area | – May not be as effective and sturdy in severe weather conditions |
| Tarp Shelters | – Can be built quickly with few materials and customizable | – May not provide as much insulation and durability as other shelter types |
| Winter Shelters | – Provides great insulation- Built to withstand heavy snow | – Requires specialized tools and knowledge to construct |
Additional Tips and Tricks for Shelter Building in the Wild
Even with careful planning and packing, unexpected events may still occur in the woods. Here are additional tips and tricks to consider:
- Wet grounds, mountaintops, open ridges, the bottom of small valleys, and ravines are all the wrong places to build a survival shelter.
- Use debris or snow to help insulate the edges of your tarp as a ground shelter in colder weather.
- When positioned lengthwise with an open crossbar, a tarp hammock makes excellent seats throughout the day.
- Rub the whole tarp with a bar composed of two parts beeswax and one part tallow or lard for reproofing.
- Sleep away from any nearby fire to prevent bouncing embers.
Conclusion
Learning to construct the ideal survival shelter is crucial for keeping alive in the wilderness.
Because extreme environmental circumstances might kill you in a few hours, finding shelter is as vital as hunting for food sources. When lost in the wilderness, your top two concerns are staying warm and having enough space to slumber.
The resources at hand and the environmental factors will determine the shelter option you will build. Overall, a usable shelter that offers safety and protection is the most fantastic shelter you can make.